
AWS CloudFront meta data in Google Analytics
Notice: This article is more than 8 years old. It might be outdated.
AWS CloudFront recently enabled support for the latest HTTP protocol version with HTTP/2 and for the latest Internet Protocol Version with IPv6. Website owners using AWS CloudFront and having enabled HTTP/2 and/or IPv6 on their distribution might now wonder how many guests use either technology. Or you might want to know where these IPv6 users are coming from. Are they really mostly coming from Mobile networks?
This post will show you how to use some Javascript code embedded in your web-page together with a small AWS Lambda script to push information about the IP version, HTTP version and CloudFront edge location into Google Analytics for each visitor.
All necessary code can be found on GitHub.
In a previous post I’ve already shown how to achieve a similar outcome while using CloudFlare.
Google Analytics Custom Dimensions
In Google Analytics custom dimensions are like the default dimensions, except that you have to fill them with data.
In this case we will need to create three custom dimensions. Each will store different values for each visitor of your website.
- IP-Version: This dimension will store the values “IPv4” or “IPv6”.
- HTTP-Version: This dimension will store the values “2.0”, “1.1”, or “1.0”.
- Edge-Location: This dimension will store the three letter IATA airport code of the CloudFront edge location, e.g. “SFO” for San Francisco.
Setup
Create custom dimensions in Google Analytics
First, set up the custom dimensions in Google Analytics:
- Sign in to Google Analytics.
- Select the Admin tab and navigate to the property to which you want to add custom dimensions.
- In the Property column, click Custom Definitions, then click Custom Dimensions.
- Click New Custom Dimension.
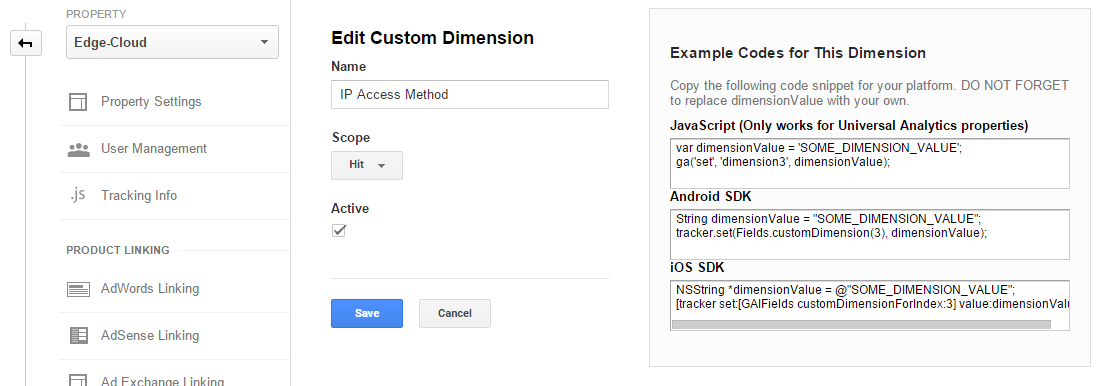
- Add a Name. This can be any string, but use something unique so it’s not confused with any other dimension or metric in your reports. Only you will see this name in the Google Analytics page.
- Select the Scope. Choose to track at the Hit, Session, User, or Product level. For this scenario I recommend to choose Hit or rather Session.
- Check the Active box to start collecting data and see the dimension in your reports right away. To create the dimension but have it remain inactive, uncheck the box.
- Click Create.
- Note down the dimension ID from the displayed example codes. (See Figure 1)
AWS Lambda Setup
We will use a small AWS Lambda script to extract the information about CloudFront edge location, IP version, and HTTP version from incoming requests.
The script can be found on GitHub.
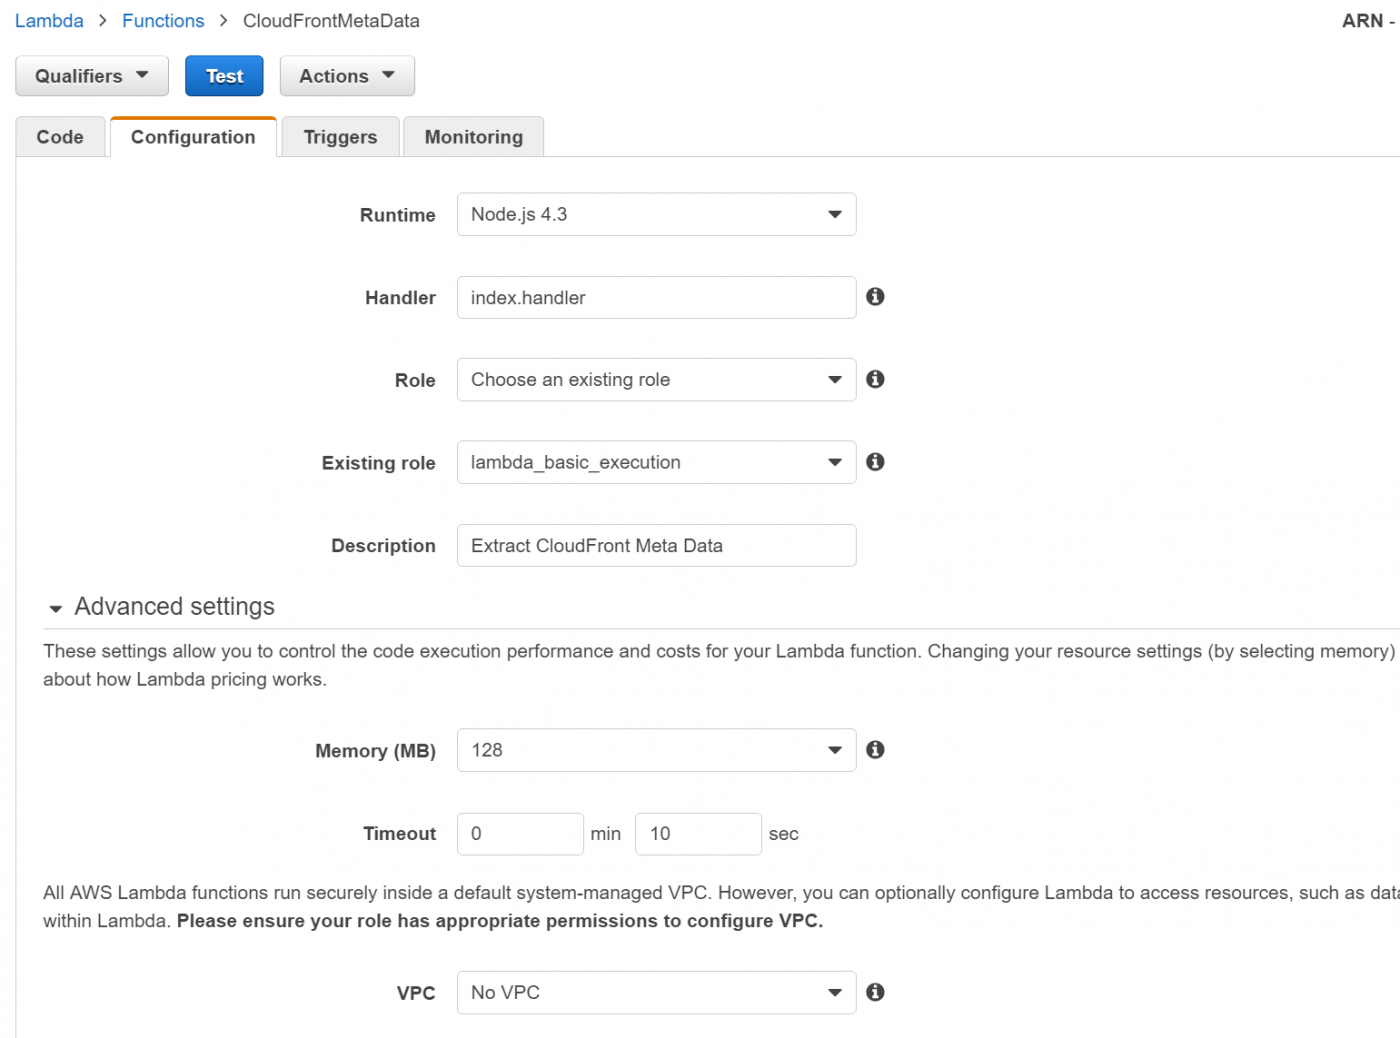
Create a new AWS Lambda Function named “CloudFrontMetaData” and using the runtime Node.js 4.3. Use the content of the “CloudFrontMetaData.nodejs” file as the source code for Lambda and keep the Handler as “index.handler”. Create a basic execution role and increase the timeout to 10 seconds (See Figure 2).
Within the Script the IP-Version is inferred by looking for the character “:” in the source IP address, the IP address that CloudFront sees. If that address does include the character “:”, it is an IPv6 address, otherwise it is an IPv4 address.
The HTTP-Version information can be extracted from the “Via” header, which is used by a proxy like Cloudfront to indicate the intermediate protocols.
The edge location can be determined with a reverse DNS lookup, based on the source IP address that Amazon API Gateway sees from CloudFront.
API Gateway Setup
Next we need to make the above AWS Lambda function accessible via a URL. This can easily be done using Amazon API Gateway. To simplify the setup you can use a prepared swagger formatted file, which can be found on GitHub.
Within the file “CloudWatchMetaData-swagger.json” change the ARN on line 50 to the ARN of your Lambda function.
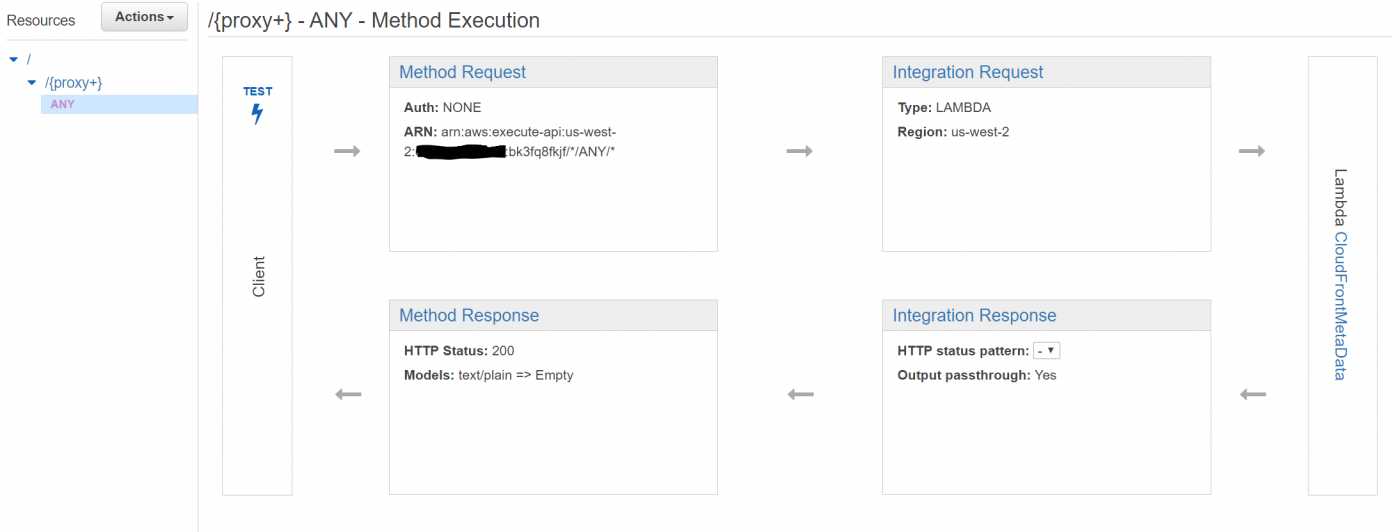
Create a new Amazon API Gateway using “Import from Swagger” and pasting the content of the above file.
This will automatically create the API Gateway with all it’s settings for you (See Figure 3).
Deploy the newly created API into the “Prod” stage and lookup the “Invoke URL” (See Figure 4).

Cloudfront Setup
Next you need to place CloudFront in front of the API Gateway URL as the API Gateway neither supports HTTP/2 nor IPv6 at this point. Therefore we need to rely on CloudFront for this task.
The easiest approach is to create a custome path within your existing CloudFront distribution. But you could also create a separate distribution.
In both cases make sure both HTTP/2 and IPv6 are enabled for this distribution.
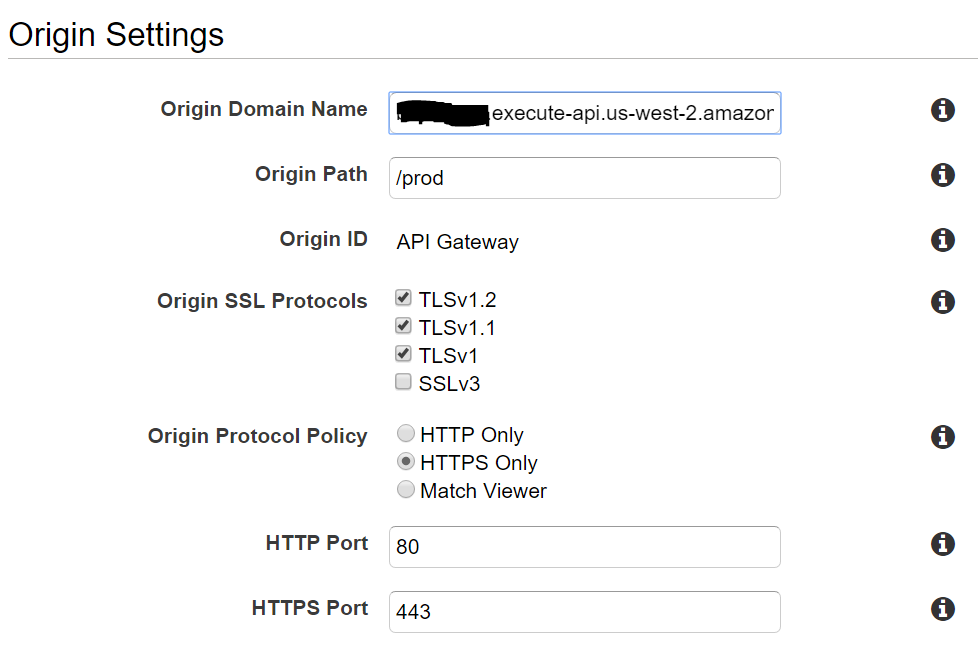
Within your existing CloudFront distribution create an additional origin with the API gateway Invoke URL, using “HTTPS only” for the “Origin Protocol Policy” (See Figure 5).
Under “Behavior” of the distribution create a path pattern for a path that your are not using, e.g. /cdn-cgi/edge-info, while specifying the API Gateway origin.
Disable caching on this path by setting Minimum TTL, Maximum TTL, and Default TTL to 0 (See Figure 6).
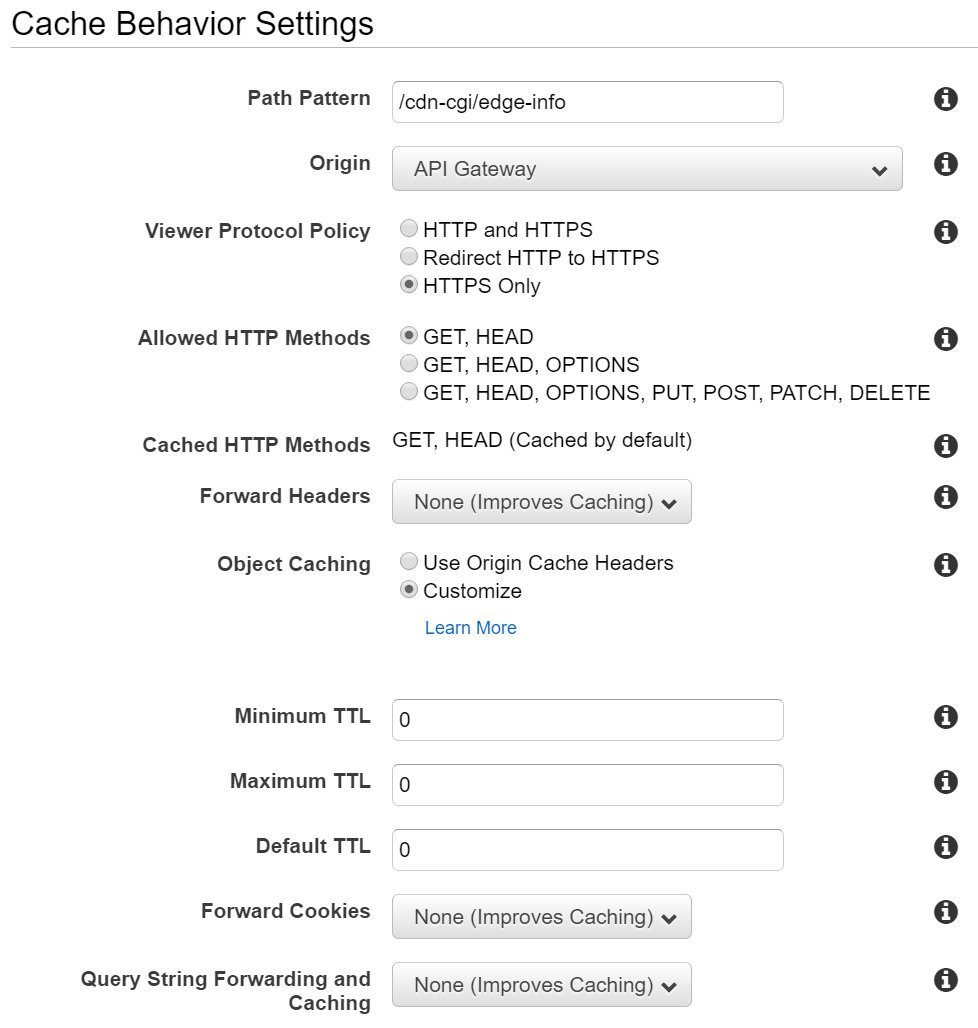
After the update to the CloudFront distribution has been completed you should find the following text information under the /cdn-cgi/edge-info URL:
ipver=IPv6
httpver=2.0
edgeloc=sfo
Embed the Google Analytics Tracking Code
Next we need to update the Google Analytics tracking code within the website, in order to fill the newly created custom dimensions with data. This tracking code has to be placed between the code for creating the Google Analytics tracker, which looks like this: gaTracker('create','UA-12345678-1','auto');, and the code to submit the tracker, which looks like this gaTracker('send','pageview');.
If you are using WordPress the easiest way to include the custom tracking code is by using the Google Analytics by Yoast plugin. This plugin allows you under Advanced > Custom Code to embed the below code right away and without any coding requirements.
The below JavaScript code will read the values from /cdn-cgi/edge-info, extract the information we are interested it and push it into the Google Analytics custom dimension variables. Ensure that the numeric IDs of these custom dimension variables matches what you have created in above steps.
Embedded the code from here into your website along with the standard Google Analytics tracking code. This custom JavaScript code will be executed by a visitor, collect metrics data from /cdn-cgi/edge-info and push it into Google Analytics.
A few hours after embedding the code you should see your first custom dimension data in Google Analytics.
Use the custom dimension in Google Analytics
Now you can use the newly created custom in Google Analytics to find out interesting information about your visitors:
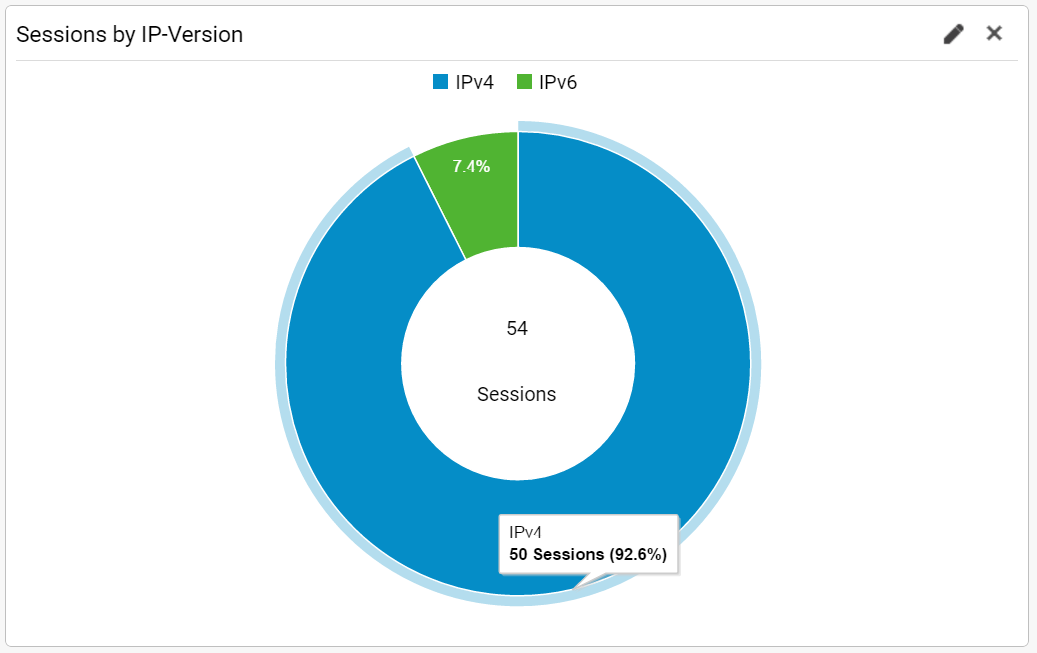
You can look at the sessions by IP-Version to figure out the percentage of IPv6 user on your website (See Figure 7).
Or you could see how many of your visitors can benefit of the improved performance of HTTP/2 over HTTP 1.1 (See Figure 8).

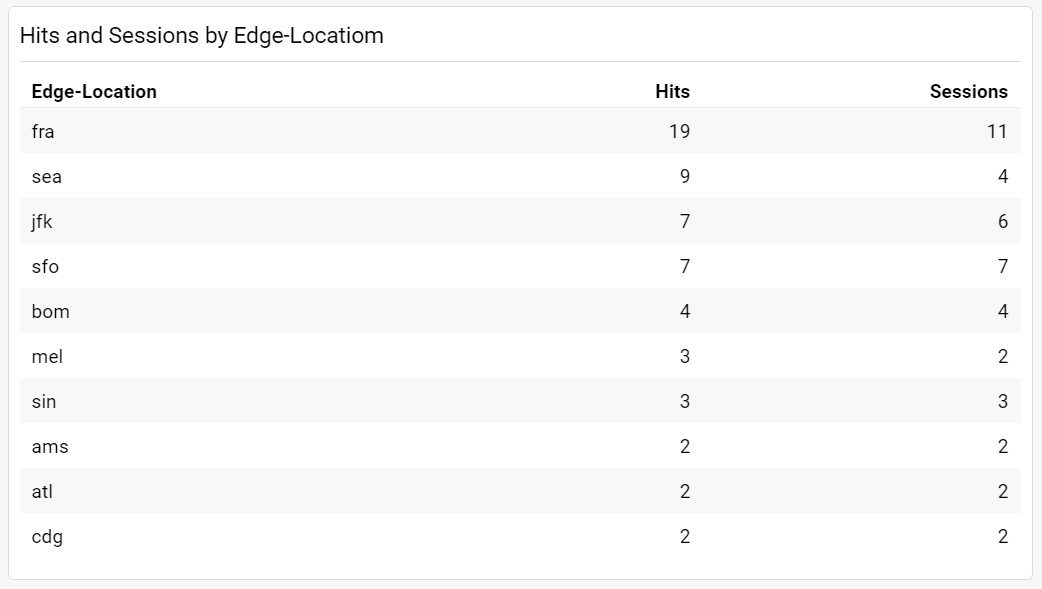
You could look at the top CloudFront edge locations serving your side (See Figure 9).
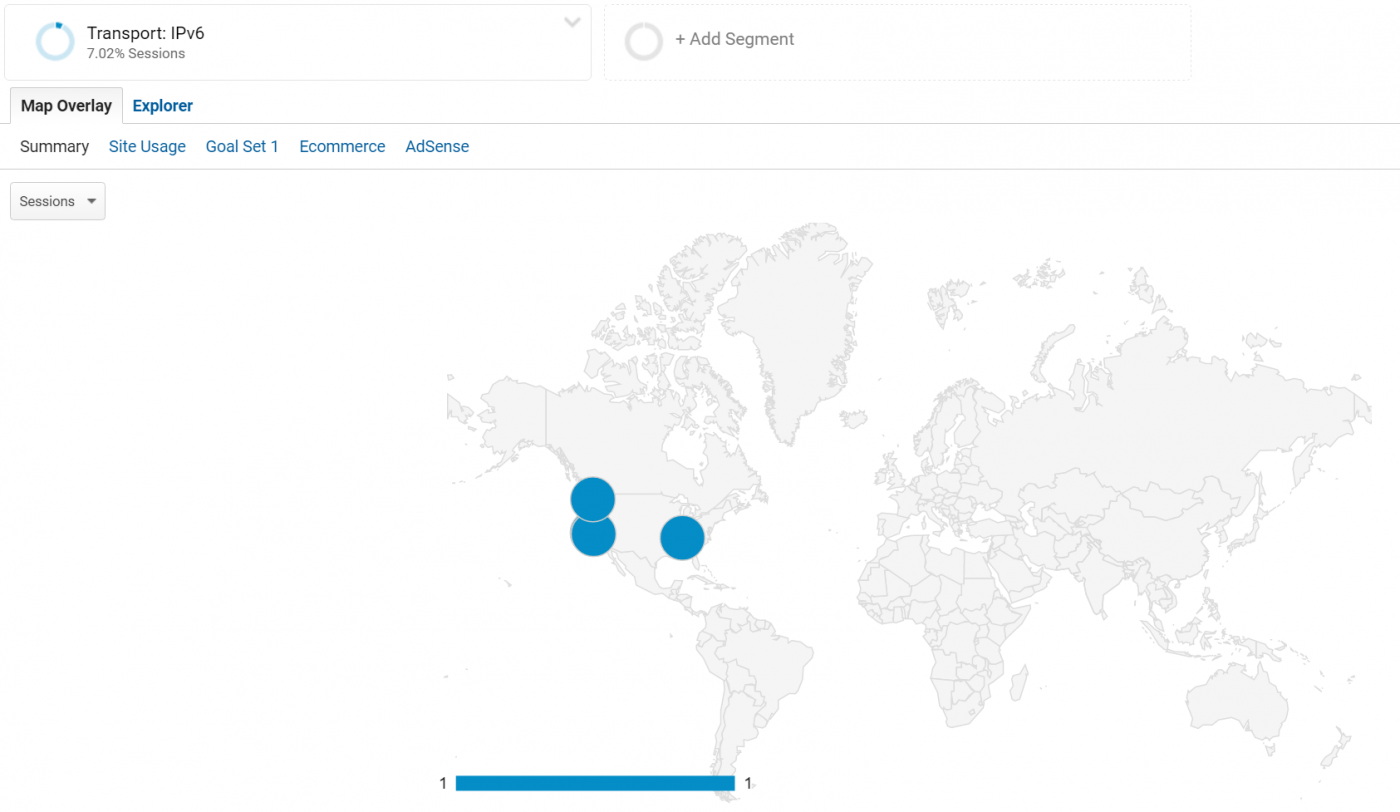
While having a look at which cities your IPv6 enabled visitors are coming from, you will notice that AWS CloudFront has not yet completed the turn up of all ASNs (See Figure 10).
Summary
This article has shown you, that you can easily built your own Real User Monitoring system with Google Analytics Custom dimensions, some simple JavaScript code and AWS Lambda. It allows you to extract many interesting metrics out of your CloudFront usage and make it available in Google Analytics for further data analysis.
Leave a comment