
Processing Flowroute text messages with AWS Lambda
Notice: This article is more than 8 years old. It might be outdated.
Flowroute is a great SIP communications provider that I’ve been using for a few years now. Especially because they support T.38 for sending and receiving fax messages.
Earlier this year Flowroute added the capability for inbound and outbound text messages (aka. SMS) to their service.
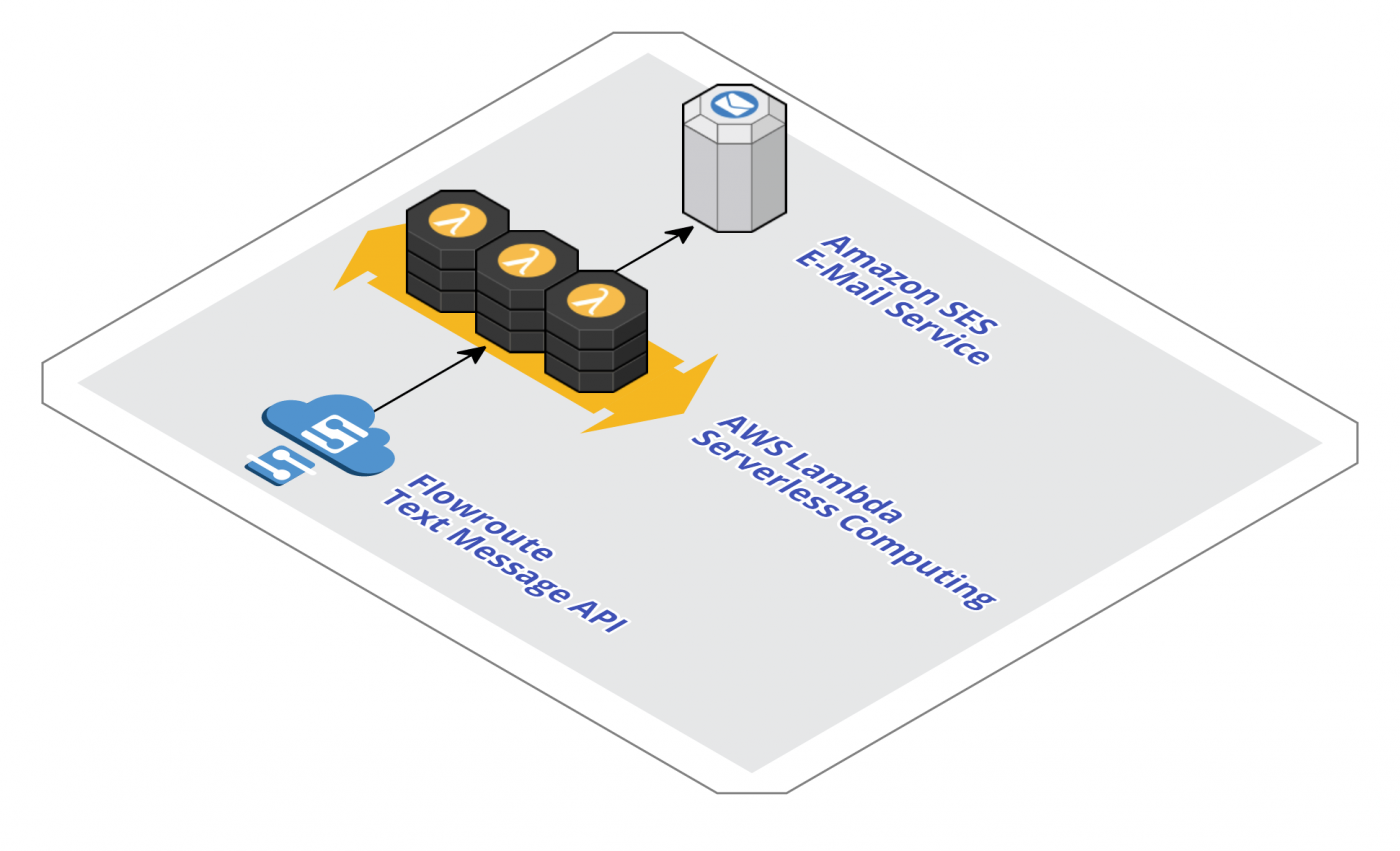
In this post I want to show you how to integrate Flowroute’s inbound text messaging capabilities with AWS Lambda - the serverless compute offering from AWS. Instead of keeping servers up and running, but mostly idle, Lambda offers you the ability to only pay for execution of a software function whenever a text message arrives. Such a solution is able to handle various loads ranging from a handful of text messages per month to millions of messages.
In this example incoming text messages are forwarded via E-Mail to a configurable address (See Figure 1). But you could as well implement other functionality, such as text message based voting or alike with this approach.
Flowroute text message API documentation
You can find more details on the Flowroute API documentation for receiving inbound text messages at https://developer.flowroute.com/.
Note that you need:
- A Flowroute phone number added to the Direct Inward Dialing page, which will receive the text message.
- A web application with a public IP or URL. This article shows you how to use AWS Lambda for creating and hosting this web application.
AWS Setup
AWS Pre-Requisites
This example uses Amazon Simple Email Service (Amazon SES) to deliver the received text message. You must at least have configured SES with a verified E-Mail address or domain in order to use it for sending E-Mails via the script below.
AWS Identity and Access Management role
AWS Identity and Access Management roles allow you to delegate access to services. The AWS services can assume a role to obtain temporary security credentials that can be used to make AWS API calls. Consequently, you don’t have to share long-term credentials or define permissions for each entity that requires access to a resource.
This approach allows us to grant AWS Lambda permission to access Amazon SES, without the need to embed credentials within the code executed by Lambda. We can therefore even store the code in a public Github repository without the risk of exposing access keys.
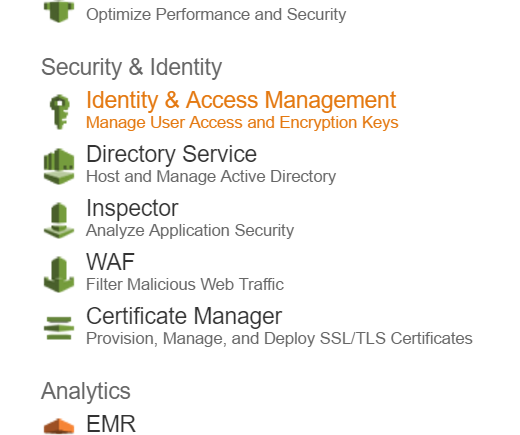
To create an AWS IAM profile navigate to the Identity & Access Management service within the Security & Identity section in the AWS Console (See Figure 2).
Create a new role and give it a meaningful name, such as Lambda_SES (See Figure 3). We will later select the role under this name.

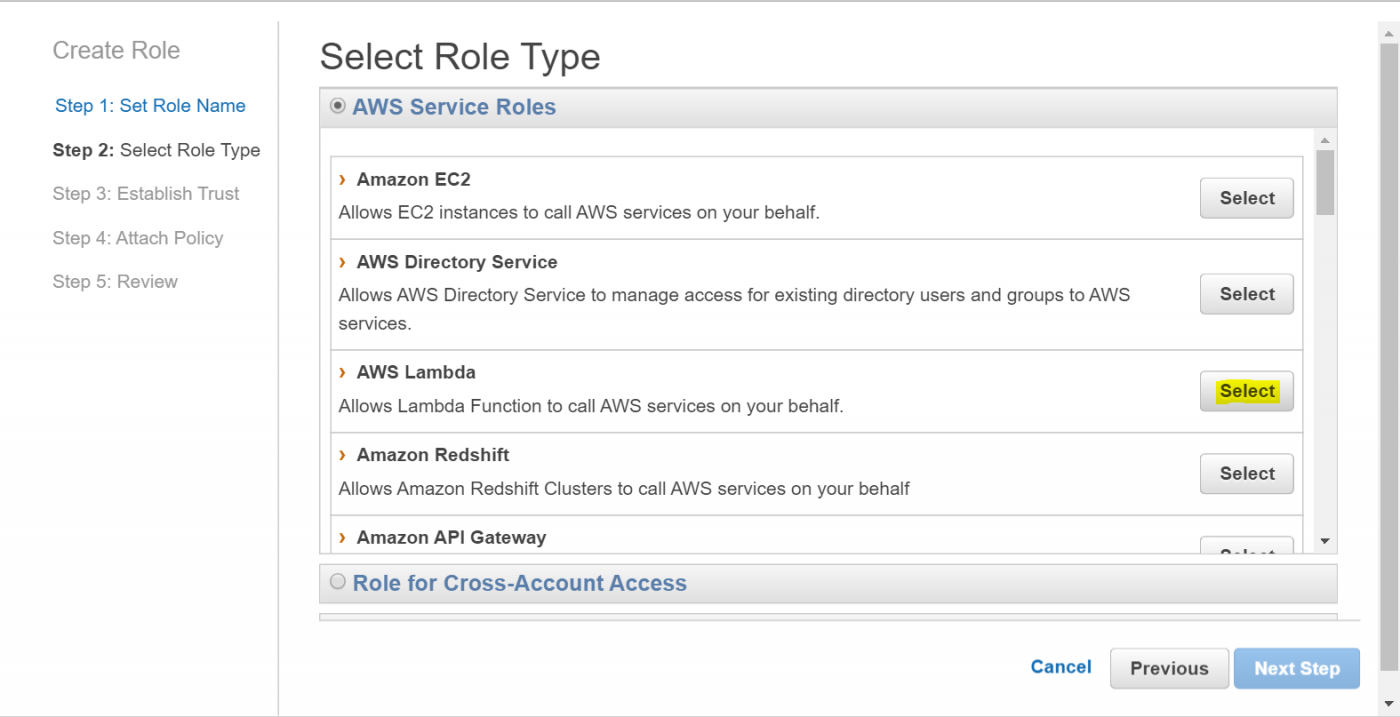
As the role type select AWS Lambda (See Figure 4). This type allows AWS Lambda functions to access other AWS services.
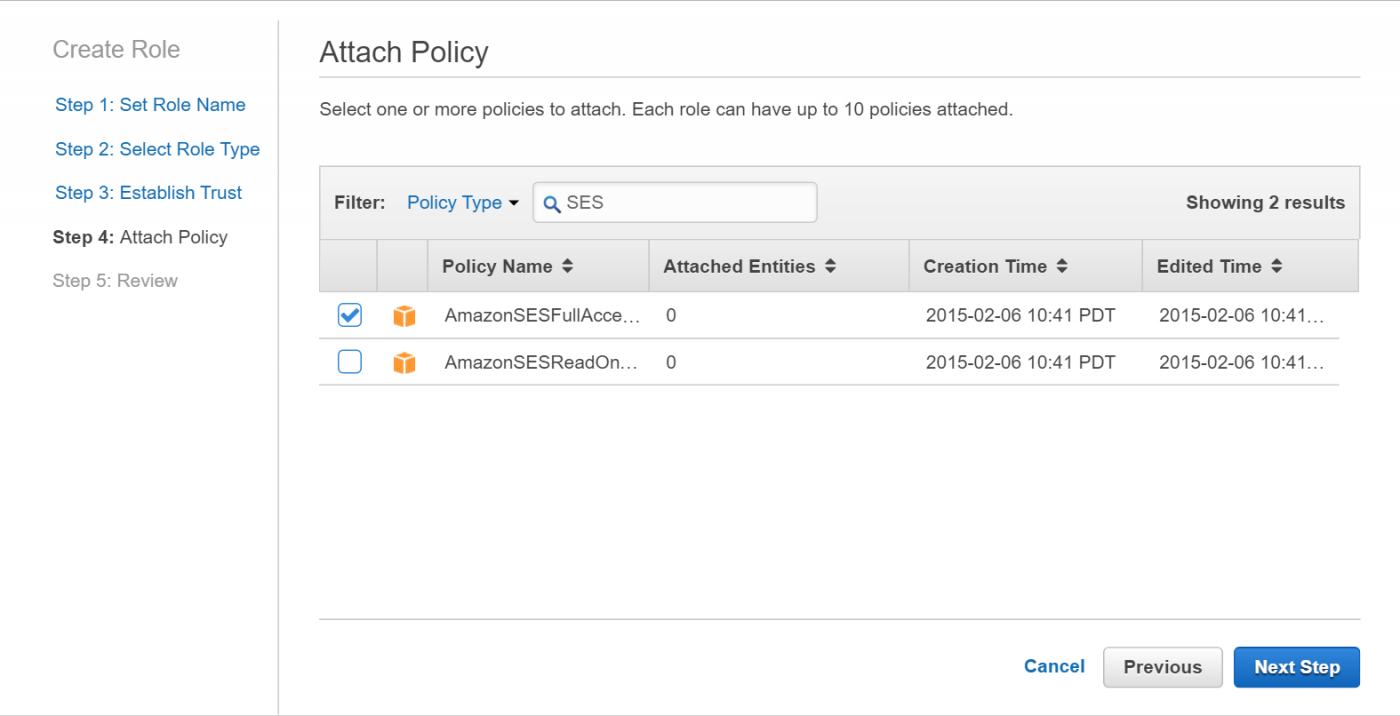
Enter SES into the Filter to only show policies that affect the Amazon Simple Email Service. Select the policy AmazonSESFullAccess and click on Next Step to proceed (See Figure 5).
Review the settings for the role to be created and confirm them by clicking on Create Role (Figure 6).
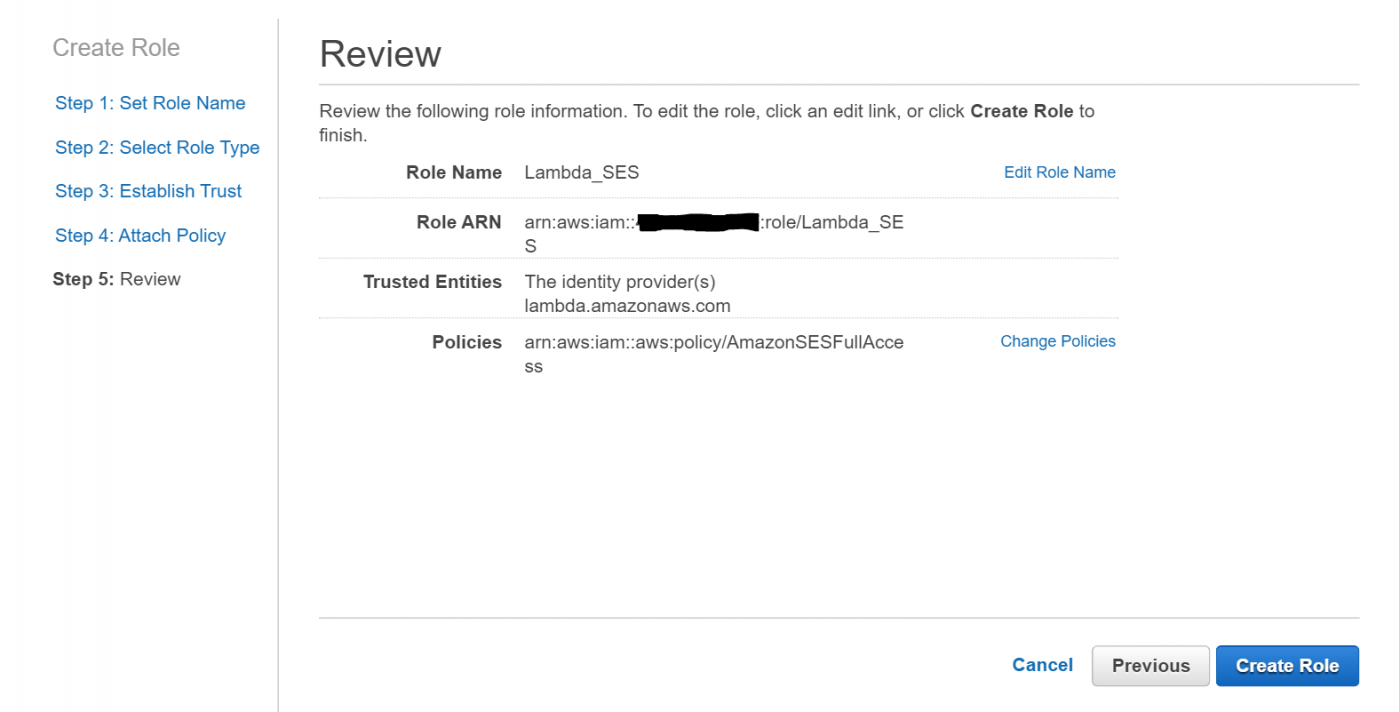
This completes creating the AWS IAM role for AWS Lambda. If you decide to use a different AWS service instead of SES, e.g. DynamoDB for storing the text messages, you will need to adapt your IAM role’s policy.
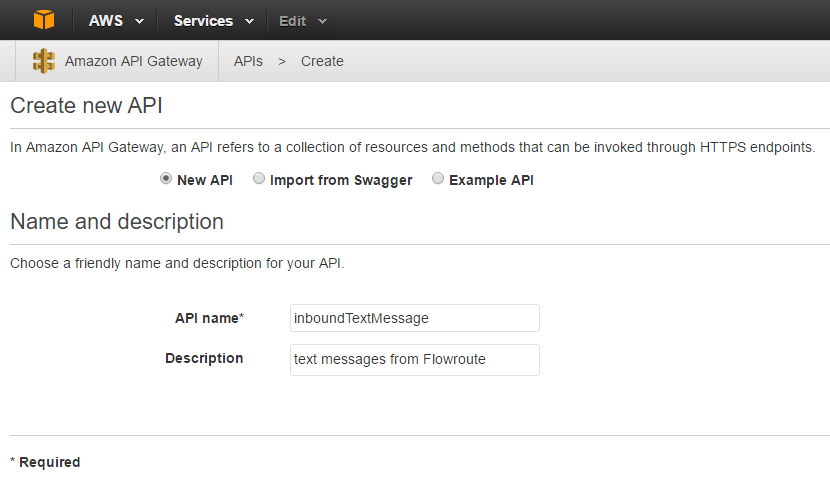
Create an Amazon API Gateway endpoint
We need to expose the AWS Lambda function via a REST API endpoint, so that Flowroute can invoke the function. Flowroute will send a POST message to the endpoint. Therefore we will solely allow POST messages to our AWS Lambda function.
Within the AWS Console, head over to the Amazon API Gateway section and create a new API. Give it a meaningful name and description (See Figure 7).
Node.js function in AWS Lambda
Next we will create a Node.js function in AWS Lambda that will perform the actual job of re-formatting the incoming text message and sending it out as E-Mail.
For this navigate to the Lambda service within the Compute section in your console. Create a new function and skip the blueprint selection.
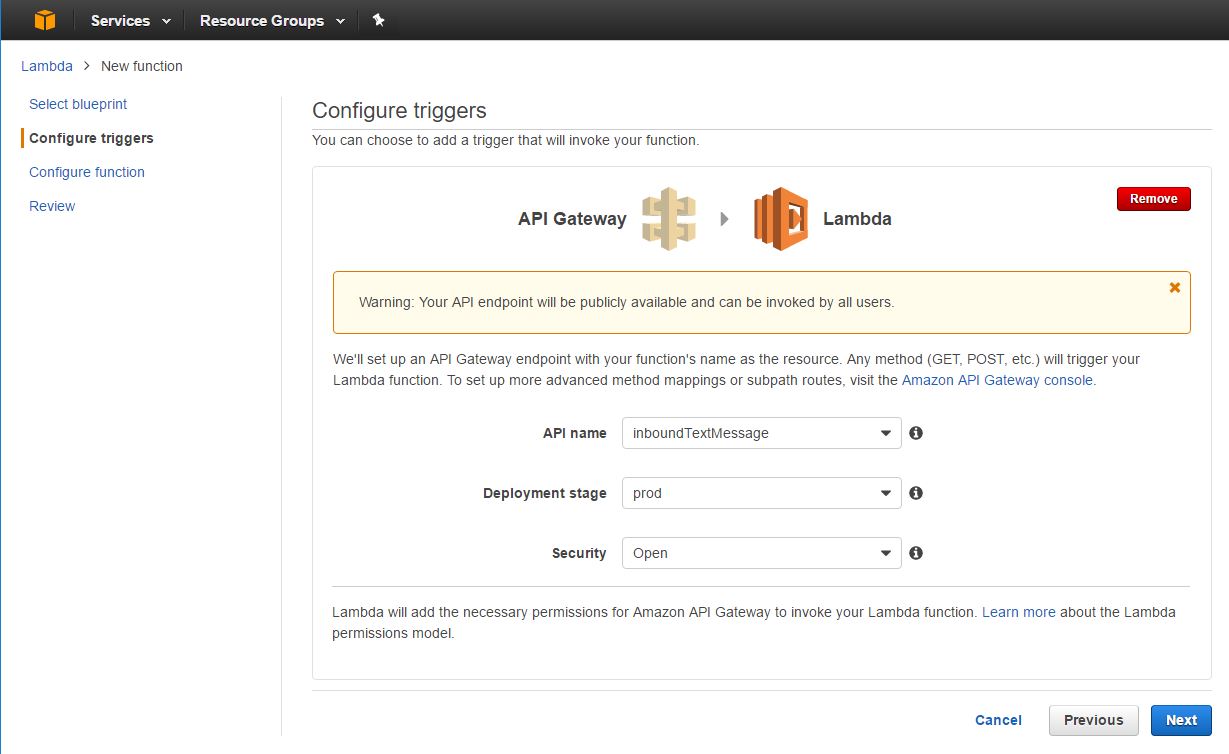
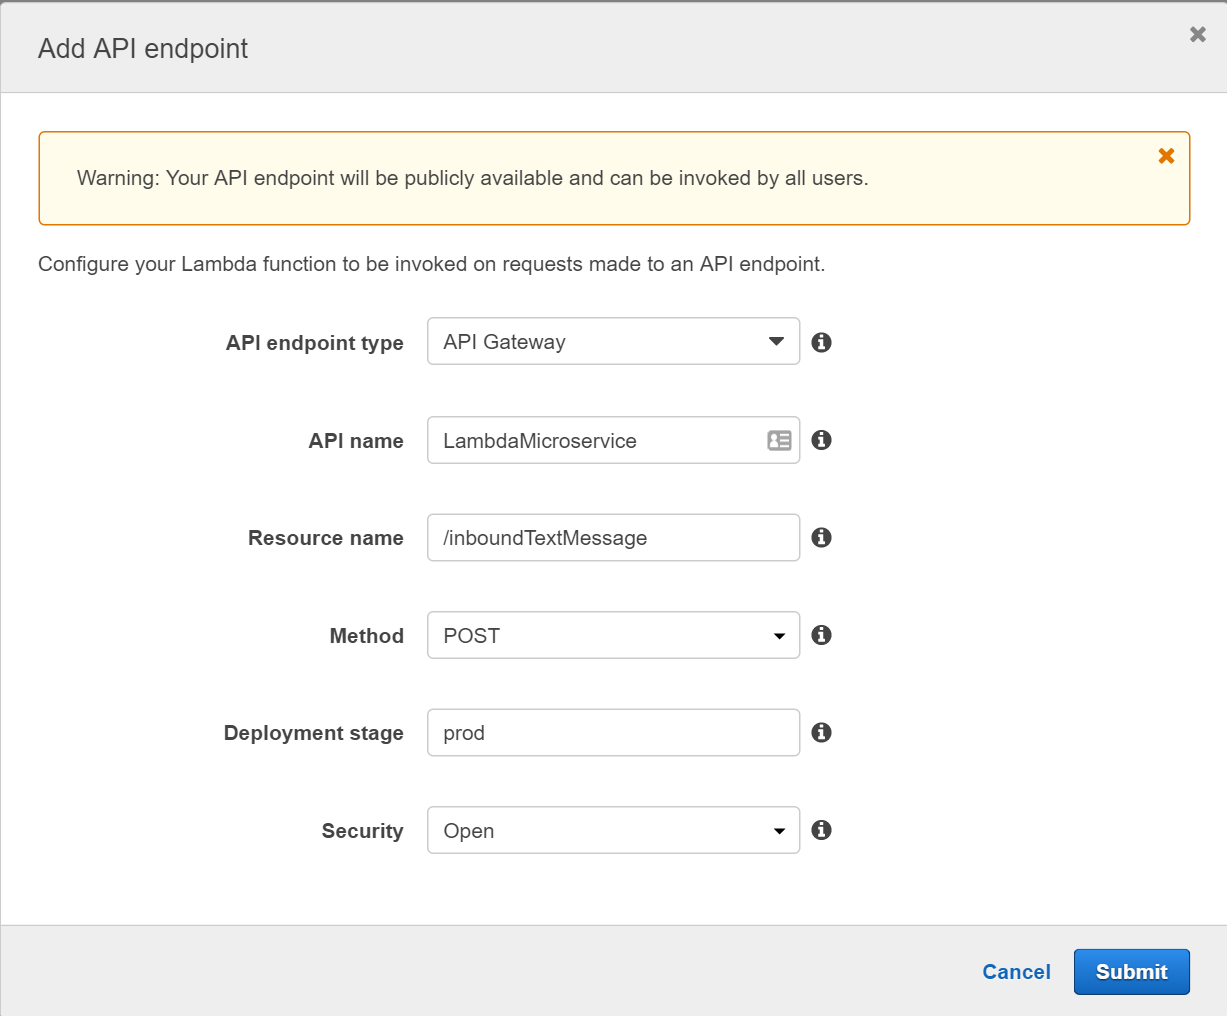
Under Configure Triggers select the API Gateway API name that you created in the previous section. Select prod for the Deployment Stage and Open for Security (See Figure 8). Flowroute will later send a POST message to this endpoint and trigger the Lambda function.
Next, configure the new function, by providing a meaning-full name, e.g. inboundTextMessage, entering a description and choosing Node.js 4.3 as the Runtime (See Figure 9)
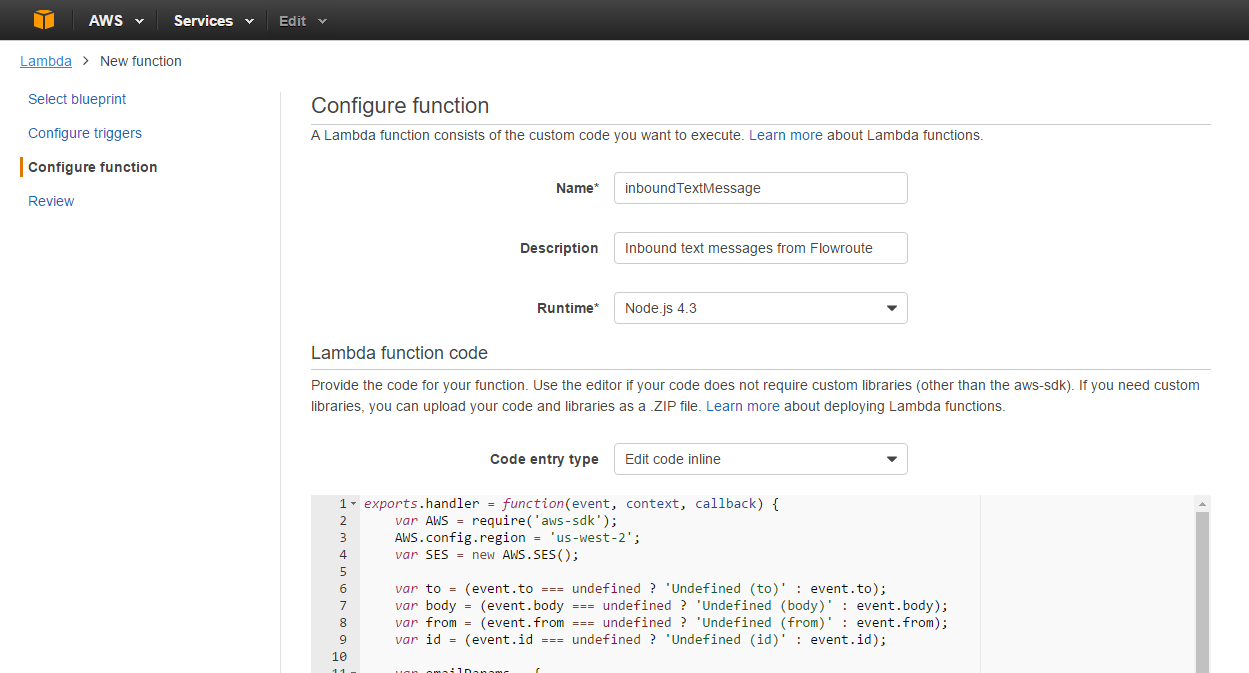
Enter the code below into the inline code window. You can also find the code on Github.
The first section sets up the AWS SDK for interfacing with Amazon SES. The next section extracts text message values out of the posted data from Flowroute. The next section formats the outgoing E-Mail message. The last section sends the E-Mail message via Amazon SES.
exports.handler = function(event, context, callback) {
    var AWS = require('aws-sdk');
    AWS.config.region = 'us-west-2';
    var SES = new AWS.SES();

    var obj = JSON.parse(event.body);
    var to = (obj.to === undefined ? 'Undefined (to)' : obj.to);
    var body = (obj.body === undefined ? 'Undefined (body)' : obj.body);
    var from = (obj.from === undefined ? 'Undefined (from)' : obj.from);
    var id = (obj.id === undefined ? 'Undefined (id)' : obj.id);

    var emailParams = {
        Destination: {
            ToAddresses: ["recipient@edge-cloud.net"]
        },
        Message: {
            Body: {
                Html: {
                    Data: "From: " + from + "<br>To: " + to + "<br>Message: " + body + "<p>ID: " + id
                },
                Text: {
                    Data: "From: " + from + "\nTo: " + to + "\nMessage: " + body + "\n\n" + id
                }
            },
            Subject: {
                Data: "Text message to " + to
            }
        },
        Source: from + "<sms@edge-cloud.net>"
    };

    var email = SES.sendEmail(emailParams, function(err, data){
        if(err) {
            var responseBody = {
                message: "Message failed"
            };

            var response = {
                statusCode: '500',
                body: JSON.stringify(responseBody)
            };
            console.log("response: " + JSON.stringify(response))
            context.succeed(response);
        } else {
            var responseBody = {
                message: "Message suceeded"
            };

            var response = {
                statusCode: '200',
                body: JSON.stringify(responseBody)
            };
            console.log("response: " + JSON.stringify(response))
            context.succeed(response);
        }
    });
};
Change the E-Mail addresses to whatever E-Mail addresses you would like to use. You might also want to adapt the AWS region in line 3, in case you use Amazon Simple Email Service in a different region than US-West-2.
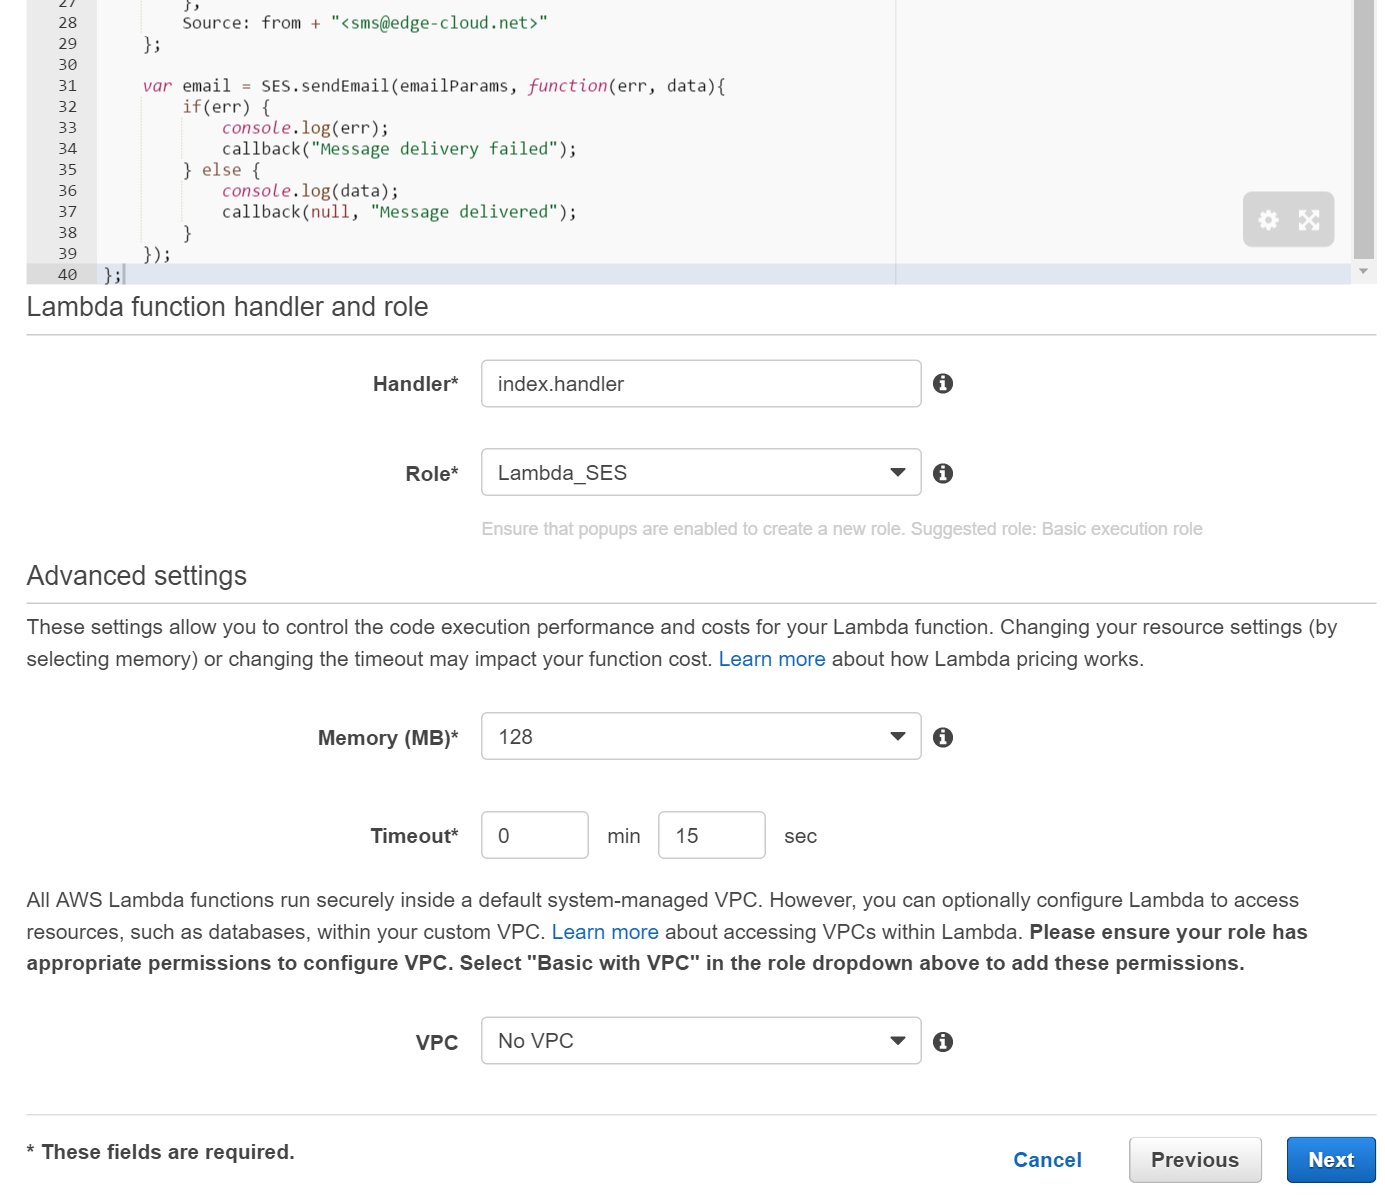
Finish the configuration step by selecting the previously created Lambda_SES role and increasing the timeout to 15 seconds (See Figure 10).
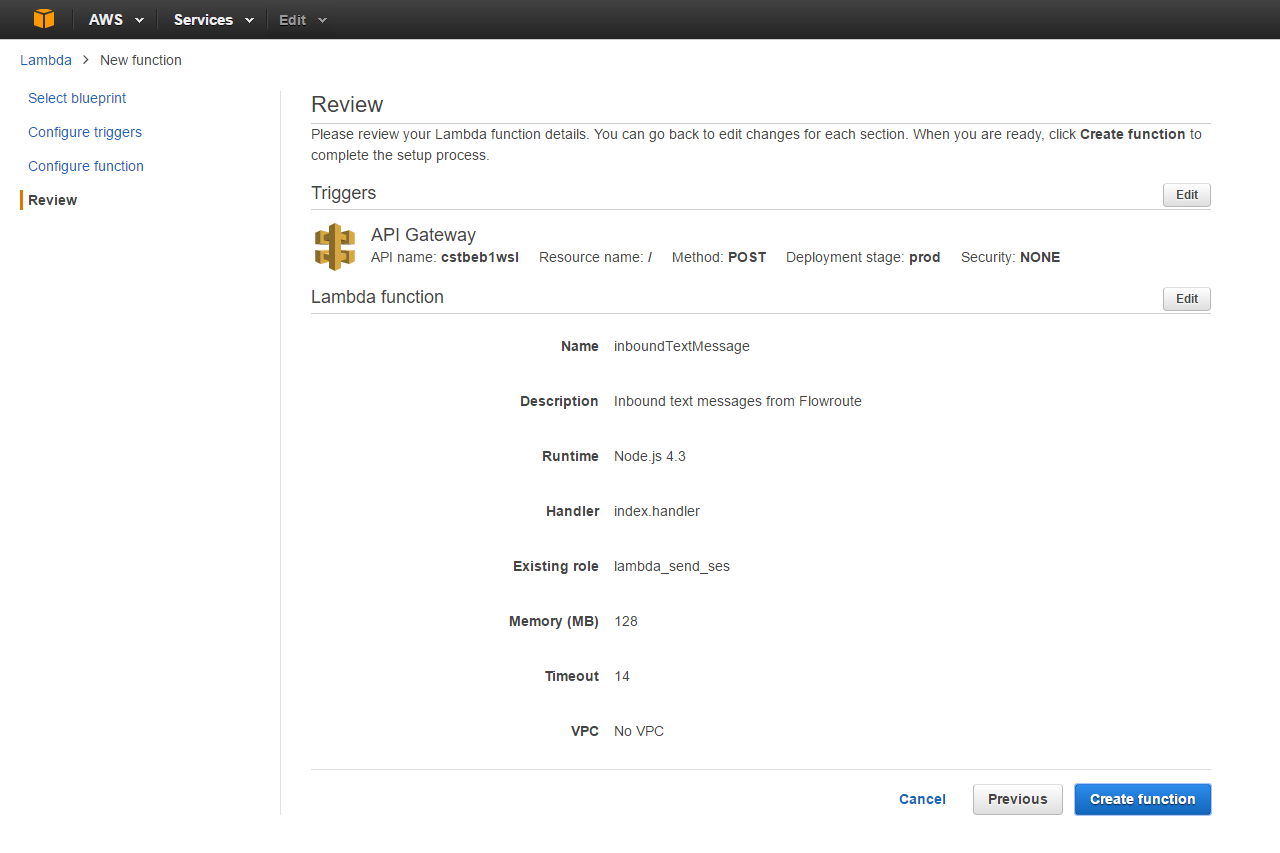
Review the settings for the function to be created and confirm them by clicking on Create function (Figure 11).
This completes setting up the AWS Lambda function for processing text messages from Flowroute.
Testing the AWS Lambda function
Next we want to test the functionality of the newly created AWS Lambda function, before proceeding any further.
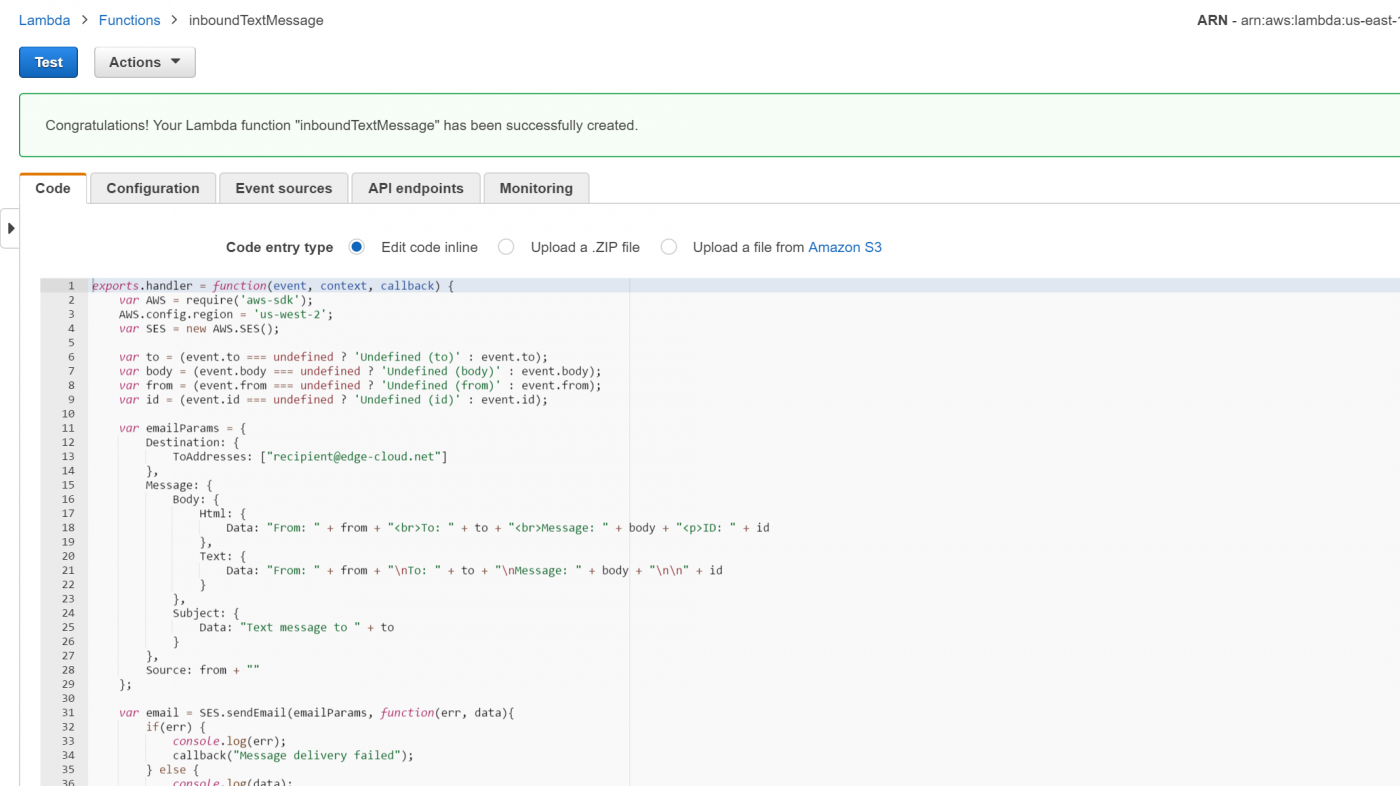
Click on the Test button in the upper left corner (See Figure 12).
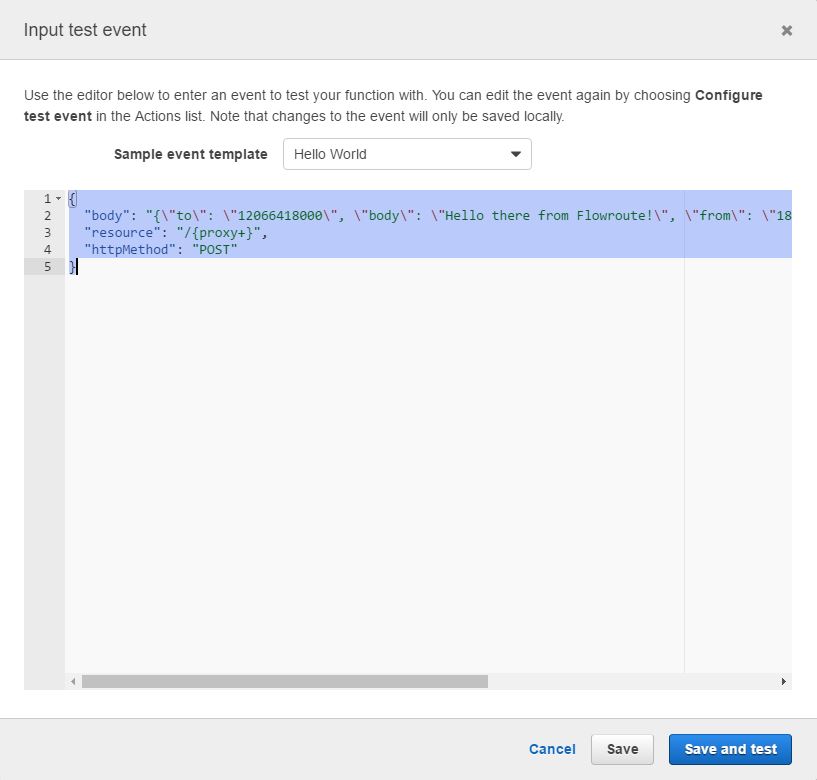
Remove the current data in the Input test event window and replace it with this test event data.
{
  "body": "{\"to\": \"12066418000\", \"body\": \"Hello there from Flowroute!\", \"from\": \"18553569768\", \"id\": \"mdr1-febb118b9b034338adfc662a8c02fd88\" }",
  "resource": "/{proxy+}",
  "httpMethod": "POST"
}
This test event data is derived from the Flowroute Messaging API documentation and is an example for what Lambda will receive from AWS API Gateway.
Execute the test by selecting Save and test (See Figure 13).
If everything was setup correctly, you should see a successful test execution with the status Message delivered (See Figure 14). Also you should receive an E-Mail message.
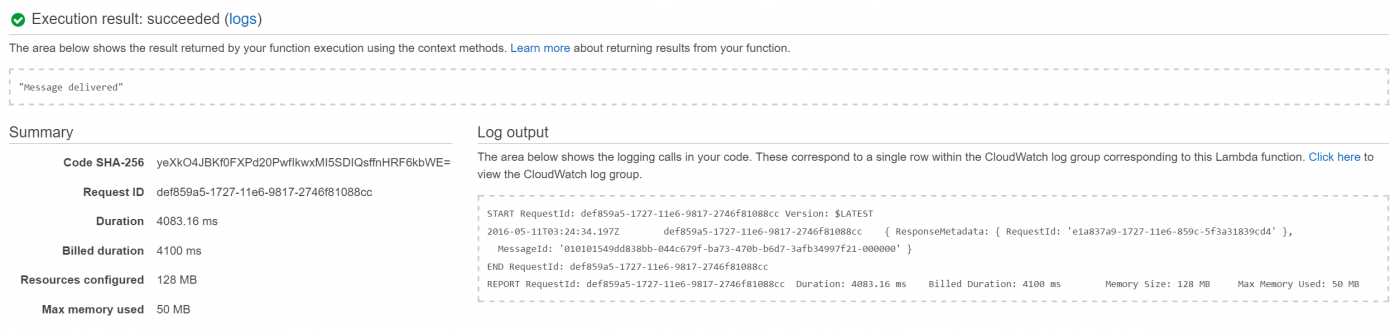
If this test failed, you need to fix the issue before proceeding. Most likely the issue was caused by a mis-configuration of Amazon Simple Email Service.
Looking up the API endpoint for the AWS Lambda function
Note down the API endpoint URL from the Lambda function’s trigger tab for further usage (See Figure 15). As Flowroute doesn’t support any of the authentication mechanism provided by Amazon API gateway yet, you need to treat the entire URL as a secret. Everyone with knowledge of the URL could invoke your Lambda function and pretend to send you a text message.
The AWS Lambda API endpoint URL will be used with Flowroute in a subsequent step.
Configuring Flowroute
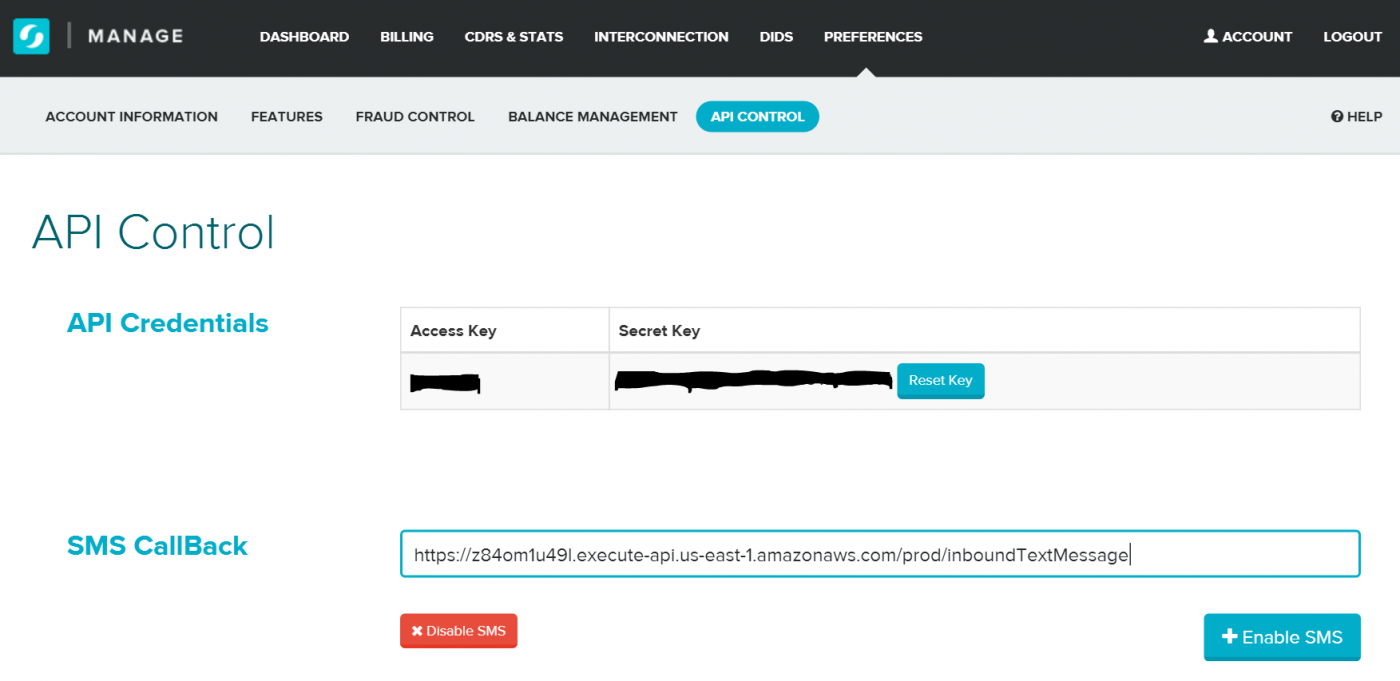
As a last step you need to configure Flowroute to use the new web service that we just created. For this head over to the Flowroute web console and open the tab Preferences -> API Control.
Enter the URL of your Lambda API endpoint into the SMS Callback field and save the configuration via a click on + Enable SMS (See Figure 16).
Congratulations! You completed your setup. Now send yourself a text message to your Flowroute DID and see you AWS Lambda turns it into an E-Mail message.
Summary
Flowroute provides a great API for sending and receiving text messages. This blog post showed you how to use AWS Lambda to process these messages and forward them as E-Mail using AWS SES.
Leave a comment