
CloudFlare: Redirect to Social Media on origin failure
Notice: This article is more than 9 years old. It might be outdated.
It happens to the best: Sometimes a web server just goes down. Ideally you would have redundancy in place for this case, with a second (or even more) web server(s) mirroring your page. But redundancy doesn’t come for free: It’s costly and might end up being complicated. Therefore you sometimes have no other choice, but to rely on a single origin web server for your web site. Especially when using a web hosting company you rely on whatever redundancy you are provide or more than often not provided with.
Nevertheless you do not want to display just nothing or a nondescript error page to your website users, when the hopefully rare moment hits and your web server does go down. One interesting approach is Dyn’s Social Failover capability, which reroutes your web traffic to your Twitter feed, Facebook page, or another URL of your choice, in case your web server goes down.
Using CloudFlare
In this post I want to show you how you can accomplish the same with any of the paid CloudFlare plan levels. For these plan types CloudFlare offers the capability to customize error messages with your own HTML code. One of these error messages would be displayed in the case where CloudFlare cannot contact your web server, e.g. because it is down.
We can make use of this capability and instead of displaying a custom error page, just display an HTML redirect to a site of your choice. This way your visitors would be redirected to this page in the case of an origin failure (See Figure 1).
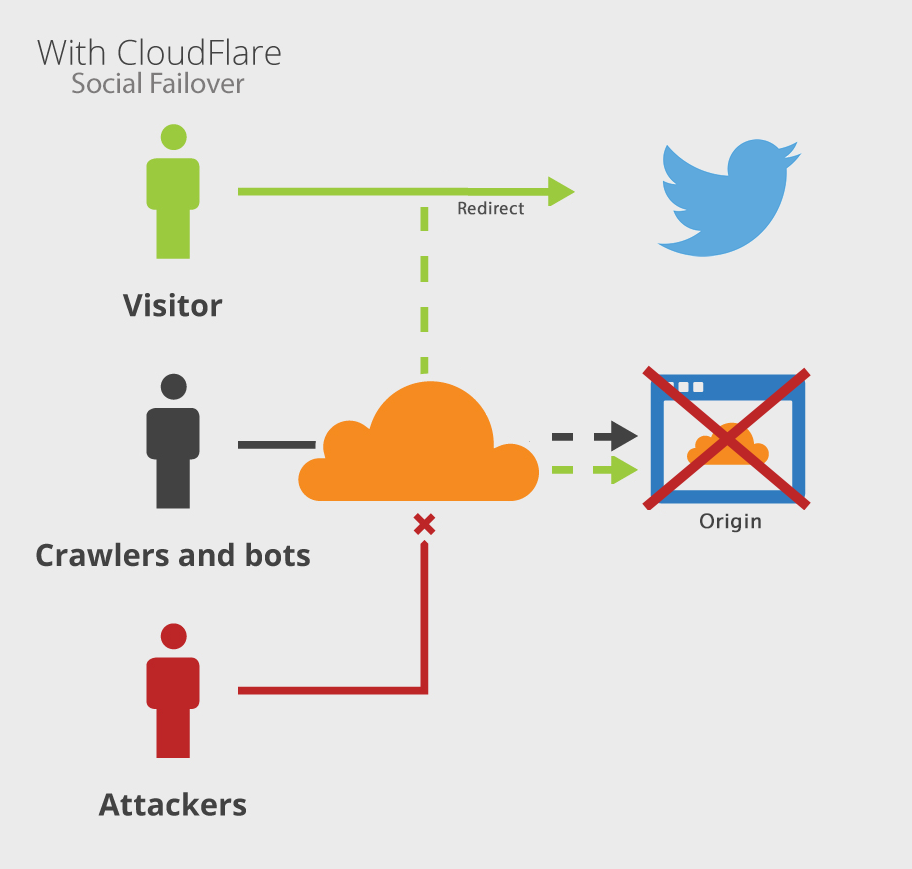
CloudFlare custom error pages as redirect
Forwarding a web browser to another website via an HTML page is quite simple and straight forward. It basically requires a single line of HTML code. For a custom error page, CloudFlare requires certain content to be show within the page for troubleshooting. In our case we don’t really care about this information as we will anyways redirect the user. Nevertheless the special CloudFlare Error box has to be included, otherwise you are not able to later utilize the HTML page. A small trick is to change the background color of our redirect page to use a black background. This way end-users won’t be confused by any error message being displayed briefly.
Preparing the custom error page
Let’s start by creating the custom error page. You can create and host this page on any place that is accessible from the Internet. This can be a temporary spot and can even be on the site that you want to use the redirect with. This page is only used briefly while CloudFlare downloads the custom error page. It will not be used during an actual outage.
In this example I place the below custom error page at https://www.edge-cloud.net/redirect.html.
<html>
  <head>
    <meta http-equiv="refresh" content="0; url=https://twitter.com/ChristianElsen" />
    <meta name="robots" content="noindex, nofollow" />
  </head>
  <body bgcolor="#000000">
    <center>::CLOUDFLARE_ERROR_500S_BOX::</center>
  </body>
</html>
You can see in the third row the actual redirect, which in this case points to my Twitter home page. We also don’t want Robots to index this temporary redirect page and certainly not to follow the redirect link. That’s what the next line is for.
You can also see the CloudFlare error box ::CLOUDFLARE_ERROR_500S_BOX::, which must be included. More on this later.
Uploading the custom error page
Within your CloudFlare account navigate to the Customize app (See Figure 2).

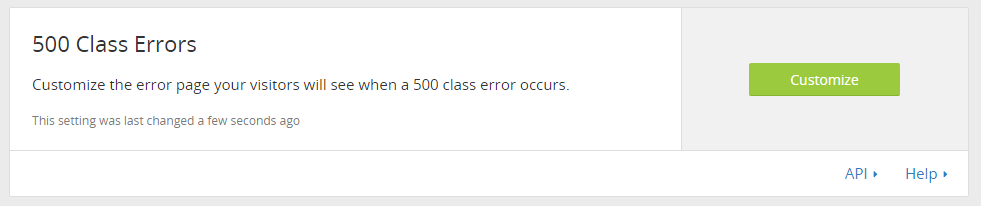
Next find the box for “500 Class Errors”. This is the kind of error that would be displayed when your origin cannot be contacted by CloudFlare and your website cannot be served. Within this box click on the “Customize” button (See Figure 3).
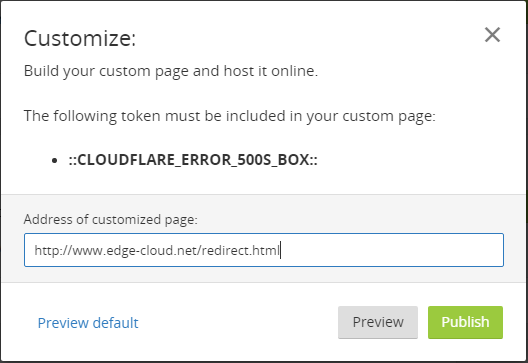
Now provide the URL to your custom error page into the “Address of customized page” field. In this example it would be https://www.edge-cloud.net/redirect.html.
Notice the warning that the CloudFlare error box ::CLOUDFLARE_ERROR_500S_BOX:: has to be included in the custom page (See Figure 4). Lucky for us, we already did this earlier.
Now you can click on the “Preview” button: A new tab will open in which you will briefly see a black page. Within a few moments this black page should redirect you to the site you selected. Once everything is working for you, click on the “Publish” button within the CloudFlare window. That’s it. You are all set.
Summary
In this article I have outlined how you can use any CloudFlare paid plan to redirect your website to your Social Networking page or any other page in case your origin server fails.
Leave a comment