OpenStack with vSphere and NSX - Part 6: Install the VMware vCenter Plugin for Openstack and look behind the scenes
Notice: This article is more than 10 years old. It might be outdated.
Welcome to the final part of the series: “OpenStack with vSphere and NSX” on installing OpenStack with VMware vSphere and VMware NSX. This series shows the deployment of an OpenStack cloud that leverages VMware vSphere – along with it’s well-known enterprise-class benefits such as VMotion – as the underlying Hypervisor. In addition, network virtualization within OpenStack will be provided via NSX as a Neutron plugin. This allows the creation of virtual networks within OpenStack that consist of L2 segments and can be interconnected via L3 to each other or the outside world.
In the previous post: “OpenStack with vSphere and NSX – Part 5: Create virtual networks and launch a VM instance in OpenStack” we took our new cloud for a quick spin and saw what we can do with it, creating virtual networks within OpenStack that consist of L2 segments and interconnecting them via L3 to each other or the outside world. Also we created our first VM instance via the OpenStack Horizon Web Interface.
In this post we will dig a bit deeper and look behind the scenes of our Cloud. First we will configure the VMware vCenter Plugin for OpenStack that provides operators using the vSphere Web Client insight into the OpenStack layer running on top. Next we will explore one of the main benefits of merging the enterprise class vSphere platform with OpenStack, by performing a vMotion operation on a VM that was created via OpenStack. Furthermore we will create a floating IP address in OpenStack and show how to connect to our VM with this IP address. Last but least, we will have a quick glance at the API capabilities of OpenStack.
Configure the VMware vCenter Plugin for OpenStack
The idea behind the VMware vCenter Plugin for OpenStack is to provide operators of the virtualization layer insight into the OpenStack layer running on top. This can greatly enhance troubleshooting capabilities, especially for the case that the vSphere virtualization layer and the OpenStack layer are managed by different people or teams.
The VMware vCenter Plugin for OpenStack is part of VOVA and is automatically installed once VOVA is pointed to a vCenter. For some reason it currently doesn’t auto-configure itself, but requires manual intervention in the vSphere Web Client. Let’s therefore perform this manual configuration:
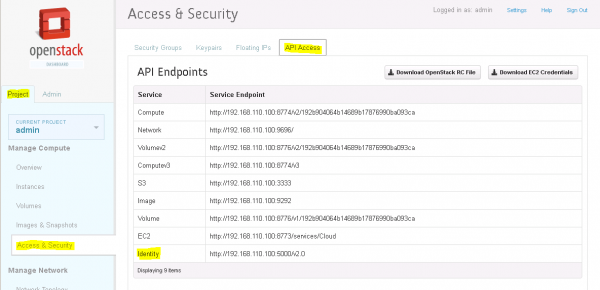
First you need to lookup the Identity API Endpoint information within your OpenStack deployment. Navigate to the Project view and the Access & Security tab. Under the API Access tab lookup the Service Endpoint for the Identity service (See Figure 1).
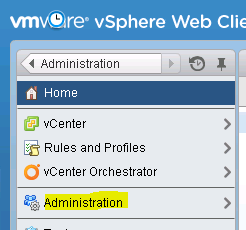
Within the vSphere Web Client navigate to the Administration tab (See Figure 2).
Next navigate to the OpenStack item in the left-hand navigation tree. Clicking the + button on the top of the grid to start the endpoint configuration (See Figure 3).
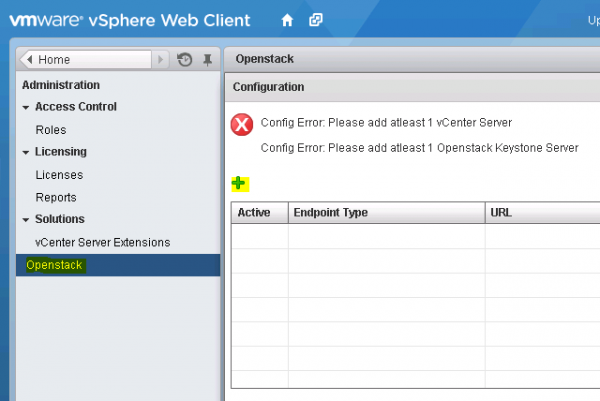
Configure the vCenter Endpoint first, providing the URL https://vcenter_ip_or_fqdn/sdk and the required credentials.
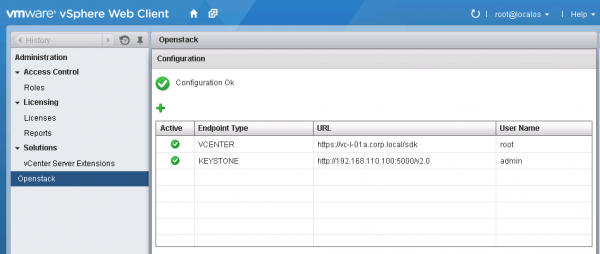
Next configure the OpenStack Keystone Endpoint. Click on the + button on the top of the grid, select Keystone and provide the URL - that you have looked up in the previous step - and the required credentials. The URL should look like http://vova_ip_or_fqdn:5000/v2.0. In my case the Endpoint configuration proved to be very finicky and random. I had to repeat these steps multiple time until both endpoint showed as Active with a green checkmark (See Figure 4).
Before you can use the vSphere Web Client OpenStack plugin, you need to logout of the vSphere Web Client and log back in.
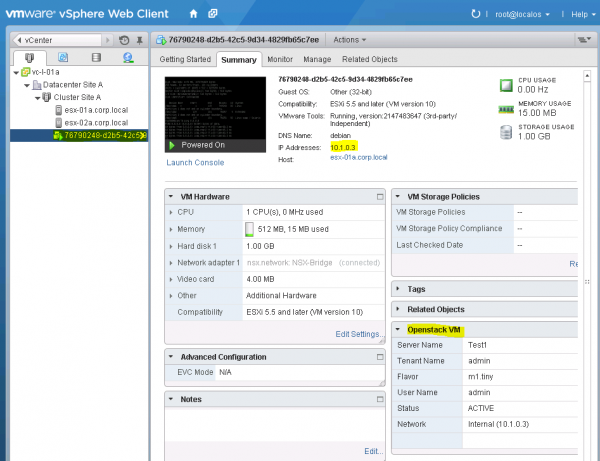
Once this has been done you can navigate inside the vSphere Web Client to a VMs summary tab. A new portlet named “OpenStack VM” displays the data properties related to OpenStack instances including the Server name, tenant name of flavor (See Figure 5).
Perform a VMotion of an OpenStack VM
One of the most heavily used features in VMware vSphere is probably VMotion. Together with the core concept of server virtualization it allows operators to migrate virtual machines within a cluster off a specific hardware host and perform maintenance on this host. This in return leads to a huge increase of uptime for workloads. We will now demonstrate exactly this capability by moving a VM that was created on vSphere via the OpenStack interface from one host to another host. This would allow us to perform maintenance on the physical host without affecting the workloads presented in OpenStack. Let’s get started.
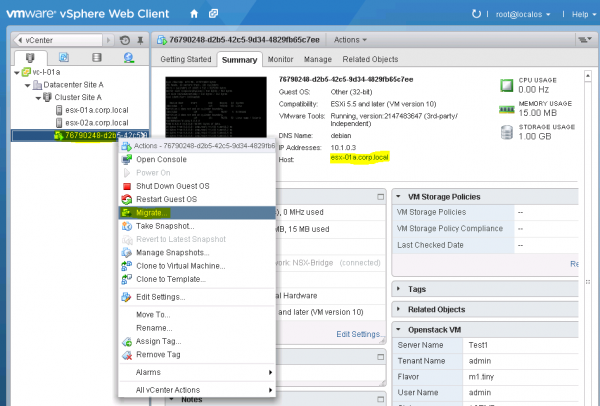
Within the vSphere Web Client navigate to a VM that was created via OpenStack. Note down the current host that this VM is running on. Perform a right-click and choose Migrate… (See Figure 6).
As the migration method choose Change Host in order to move the VM to another host (See Figure 7).

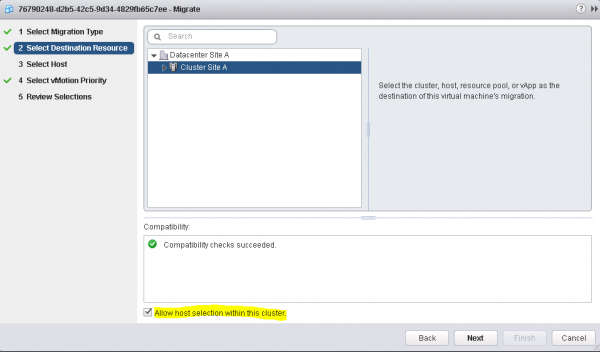
Select the destination cluster and tick the box for Allow host selection within this cluster in order to pick a specific host (See Figure 8).
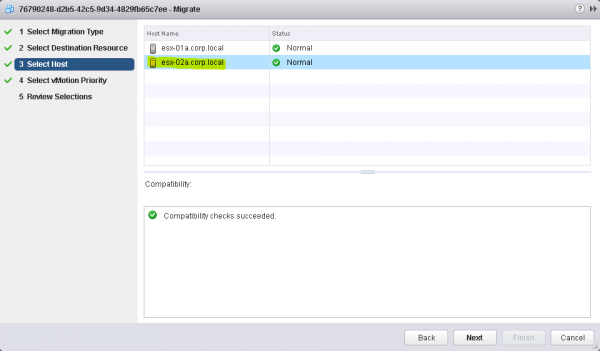
Select the specific host to which you want to migrate the VM (See Figure 9). This host should obviously differ from the initial host.
Wait for the VMotion to complete successfully. Note that the VM now resided on a different host (See Figure 10).
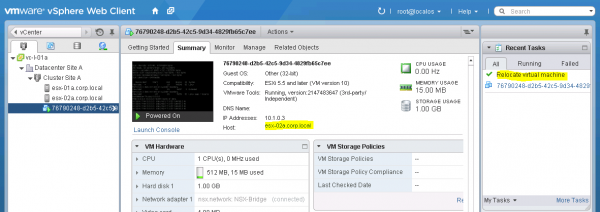
You will not notice any difference from within OpenStack about the performed VMotion. In fact, the above operation remains completely invisible and unnoticed from OpenStack, which is exactly what we want.
Configure a floating IP
Next we will configure a floating IP address for a VM in OpenStack. A floating IP address allows you to reach VMs connected to an internal network from the outside or external network. This is accomplished by OpenStack configuring a Destination NAT (DNAT) rule on the L3 gateway between the external and internal networks.
Within the OpenStack Web interface navigate to the Project view and there pick the Instances tab. Select a VM and click on More within the Actions column. Now select Associate Floating IP (See Figure 11).
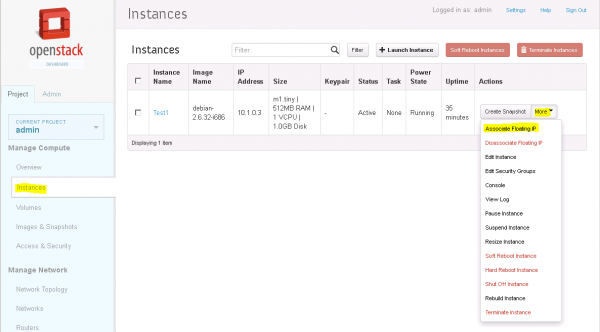
Initially no floating IP address is available within the project to be used. We therefore need to allocate a new address. For this click on the “+” icon next to the IP address field (See Figure 12).
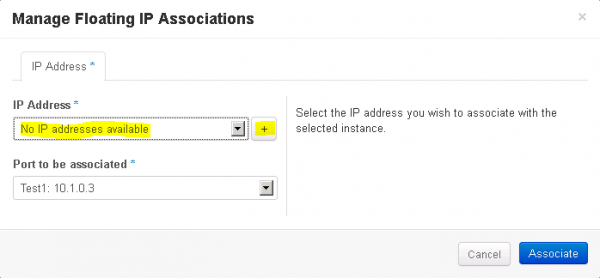
Now select the pool from which you want to select the floating IP address. In this setup only the External pool, which corresponds to the external network is available. Click on Allocate IP to finish the allocation (See Figure 13).
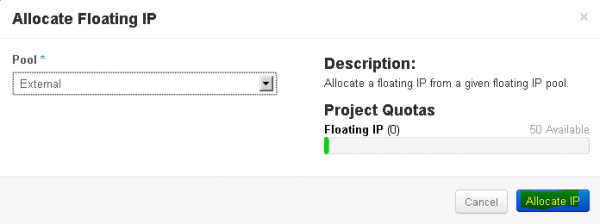
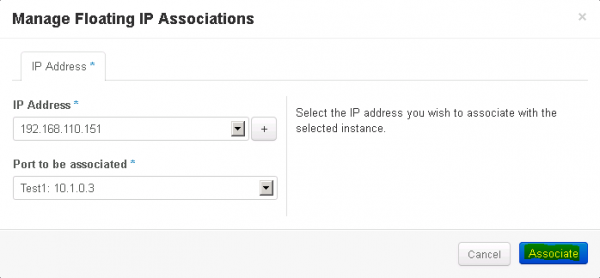
Now that an IP address from the External pool has been successfully allocated, it can be associated with the internal IP address of the VM. Click on Associate to finish this association (See Figure 14).
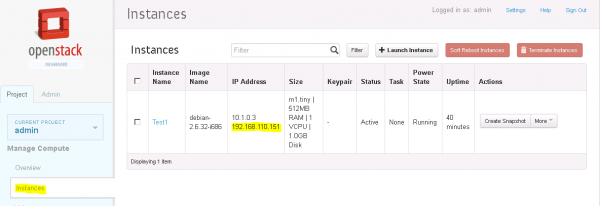
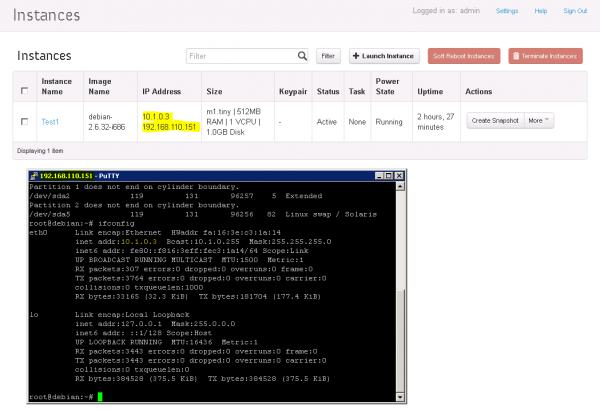
The instances view will now display the associated external IP address for the VM besides the internal address (See Figure 15).
In case you would try to connect to this external IP address now, the result would be disappointing: It won’t work. That’s because the default Security Group settings associated with the VM prevent this access. The idea here is to prevent any kind of external access by default and require users to explicitly grant specific access. Therefore we need to e.g. allow SSH access to the VM, before we can fire up Putty and connect.
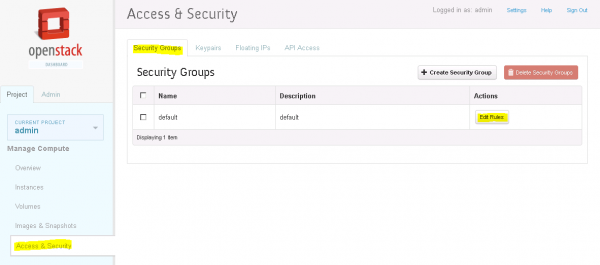
Navigate to the Access & Security tab and select Security Groups. You will find the security group default, which is the only security group currently in use. Click on Edit Rules to start editing (See Figure 16).
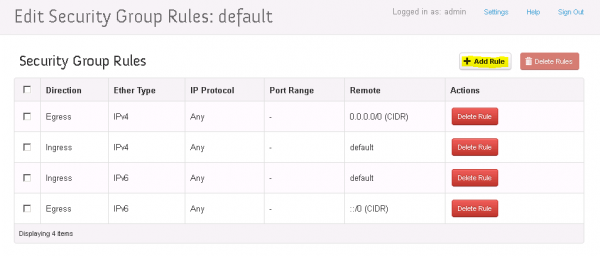
Next click on Add Rules to add a rule for SSH (See Figure 17).
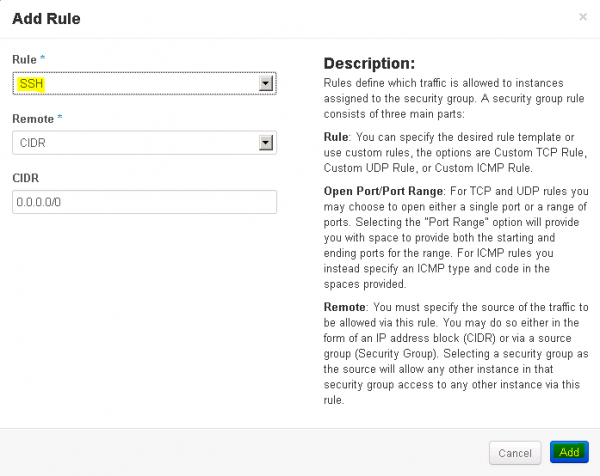
As Rule select SSH. For Remote select CIDR and for CIDR enter 0.0.0.0/0. This will allow SSH from anywhere. Click on Add to finalize the wizard. (See Figure 18).
Notice the new rule for SSH, which indicates the correct TCP port 22 for SSH (See Figure 19).

Now you can use Putty or any other SSH client and successfully connect to the external floating IP address of the VM (See Figure 20).
API-driven creation of a VM in OpenStack
One of the big benefits of OpenStack is the simple, yet very powerful API along with various SDK for all kinds of programming languages. Let’s use the Python SDK for creating a new VM via the OpenStack API.
Below is a simple Python script, which will connect to your OpenStack cloud, create a new VM and start it.
import novaclient.v1_1.client as nclient
import time
creds = {"username":"admin",
         "api_key":"VMware1!",
         "project_id":"admin",
         "auth_url":" http://localhost:5000/v2.0/ "
}
print "Booting a debian VM from python..."
nova = nclient.Client(**creds)
print nova.images.list()
image = nova.images.find(name="debian-2.6.32-i686")
print nova.flavors.list()
flavor = nova.flavors.find(name="m1.tiny")
print nova.networks.list()
network = nova.networks.find(label="Internal_Shared")
instance = nova.servers.create(name="created-from-python",image=image, flavor=flavor, nics=[{'net-id': network.id}])
while instance.status != 'ACTIVE':
        print "Waiting for VM... (current status '%s')" % instance.status
        time.sleep(5)
        instance = nova.servers.get(instance.id)
print "VM booted to status '%s'" % instance.status
The elements that you need to adapt to your own environment are:
- username: Your OpenStack username
- api_key: Your OpenStack password
- project_id: The name of the project in which the VM should be created.
- auth_url: Change it to the IP address of your local OpenStack cloud.
- image: The name of the available image you want to use.
- flavor: The flavor of the VM you want to use.
- network: The name of the network to which this VM should get connected to.
You can run this script directly from VOVA. As VOVA is based on Ubuntu you can use the command sudo apt-get install python-novaclient to install the required SDK.
Wrap-Up
Congratulation! We successfully looked behind the scenes into VMware vSphere to see what’s happening during the operation of OpenStack on vSphere. We also installed the VMware vCenter Plugin for Openstack to gain more insight into OpenStack from vSphere, as well as used some of the well-known enterprise-class benefits of vSphere – such as VMotion – along with OpenStack. Furthermore we took a glimpse at how to use OpenStack’s legendary APIs to automate the deployment of a VM. This completes the series: “OpenStack with vSphere and NSX” on OpenStack with vSphere and NSX.
If you are at VMware Partner Exchange (PEX) from February 10-13 2014, head over to the Hands-On Labs and check out the lab “HOL-SDC-1320 - OpenStack on VMware vSphere” in order to get hands-on experience with the setup described in this setup. After PEX this lab will also become available for general usage within the VMware Hands-On labs.
Also if you want to learn more about using OpenStack with VMware vSphere, have a look at the VMware whitepaper “Getting Started with OpenStack and VMware vSphere”.

Leave a comment