OpenStack with vSphere and NSX - Part 3: Install and configure the Open vSwitch inside the ESXi hosts
Notice: This article is more than 11 years old. It might be outdated.
Welcome to part 3 of the series on installing OpenStack with VMware vSphere and VMware NSX. This series shows the deployment of an OpenStack cloud that leverages VMware vSphere – along with it’s well-known enterprise-class benefits such as VMotion – as the underlying Hypervisor. In addition, network virtualization within OpenStack will be provided via NSX as a Neutron plugin. This allows the creation of virtual networks within OpenStack that consist of L2 segments and can be interconnected via L3 to each other or the outside world.
In the previous article: “OpenStack with vSphere and NSX – Part 2: Create and configure the VMware NSX cluster” we completed the basic configuration of the NSX cluster via the NSX Manager, by adding the gateway and service node to the NSX cluster. This article will highlight the installation and configuration of the Open vSwitch inside the ESXi hosts.
Verify pre-requisites
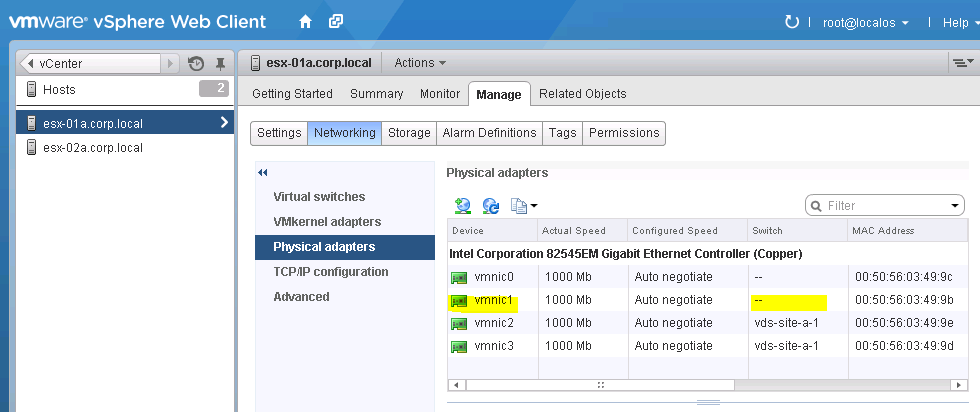
The NSX vSwitch is a virtual switch for the VMware vSphere platform, similar to its brothers the Standard vSwitch and the Virtual Distributed Switch. As such the NSX vSwitch needs a dedicated physical uplink (vmnic) to connect to the upstream network. Before proceeding to the actual installation, ensure that you have a vmnic interface available on all your ESXi hosts (See Figure 1). In this guide I will be using vmnic1 for all ESXi hosts.
Install the NSX vSwitch
The NSX vSwitch is provided as a vSphere Installation Bundle (VIB) that needs to be installed on each ESXi hosts that you plan on using. While various methods exist for installing a VIB on an ESXi host, this article will showcase the installation via an SSH connection.
First make the VIB file available to the ESXi hosts via e.g. shared storage (See Figure 2). This will greatly simplify the work associated with copying the VIB file to the ESXi hosts.

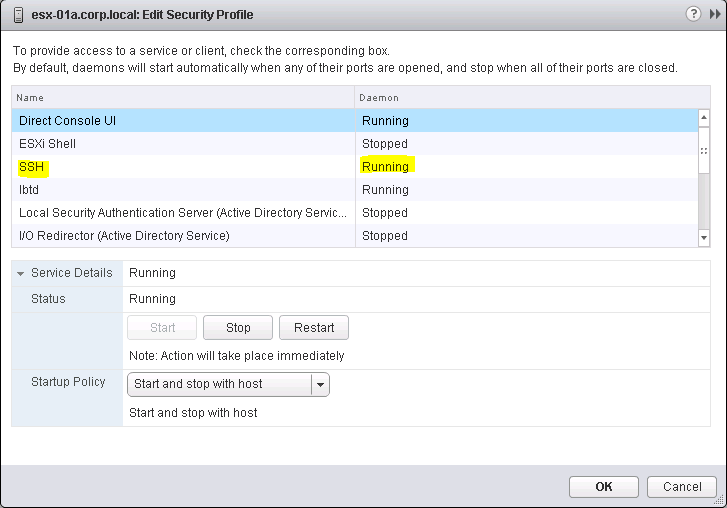
Next temporarily enable SSH access to the ESXi hosts (See Figure 3). After we are done with the installation of the VIB file, you can turn off the SSH daemon again.
After you have enabled SSH access the ESXi hosts, connect to your first ESXi host via SSH. Start the installation of the NSX vSwitch VIB file via the command esxcli software vib install --no-sig-check -v <path and filename>:
~ # esxcli software vib install --no-sig-check -v /vmfs/volumes/SiteA-IPv6-NFS/vmware-nsxvswitch-2.0.1-30494-release.vib
Installation Result
   Message: Operation finished successfully.
   Reboot Required: false
   VIBs Installed: VMware_bootbank_vmware-nsxvswitch_2.0.1-30494
   VIBs Removed:
   VIBs Skipped:
~ #
Ensure that the VIB is installed successfully.
Configure the NSX vSwitch
While the configuration of the Standard vSwitch and the virtual Distributed Switch is usually done via vCenter, the NSX vSwitch is configured via the CLI. Therefore let’s go ahead and configure the NSX vSwitch for this host.
Start by linking the NSX vSwitch to a physical uplink interface (vmnic). This is done via the command nsxcli uplink/connect <interface>:
~ # nsxcli uplink/connect vmnic1
~ #
Next we configure the IP address for the transport endpoint. This transport endpoint creates overlay tunnels with other transport endpoints, such as Hypervisors, Gateway nodes and Service Nodes. The NSX vSwitch uses a separate IP stack for this, which means that the VMWare NSX transport endpoint has its own default gateway.
Set the IP address of the transport endpoint with the command nsxcli uplink/set-ip <interface> <ip address> <netmask>:
Note: If the physical switchport that this vmnic connects to is not configured as an access port but as a trunk, you will need to also specify the correct VLAN to be used with the command nsxcli uplink/set-ip <interface> <ip address> <netmask> vlan=<id>
~ # nsxcli uplink/set-ip vmnic1 192.168.110.121 255.255.255.0
~ #
Next, set the default gateway with the command nsxcli gw/set tunneling <ip address of default gateway>
~ # nsxcli gw/set tunneling 192.168.110.2
~ #
Next is the creation of a Transport-Net Bridge to which Virtual Machines will later connect to. The name of this Bridge needs to be known to our OpenStack installation for the architecture to work. As we will be using vSphere OpenStack Virtual Appliance (VOVA) this uuid and name must be NSX-Bridge.
Create the NSX bridge with the command nsxcli network/add <UUID> <Name>:
~ # nsxcli network/add NSX-Bridge NSX-Bridge nsx.network manual
success
~ #
Similar to the NSX appliances, the next step registers the NSX vSwitch with the NSX controller. First use the command nsxcli manager/set ssl:<IP address of a NSX controller node> to point the NSX vSwitch to the NSX controller. In the case of an NSX controller cluster you can specify any IP address of a cluster member.
~ # nsxcli manager/set ssl:192.168.110.101
~ #
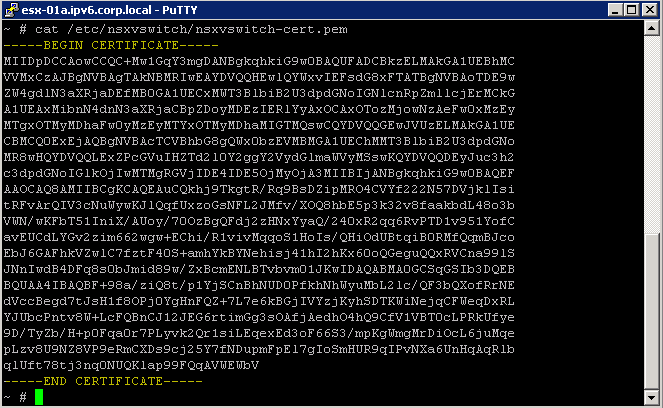
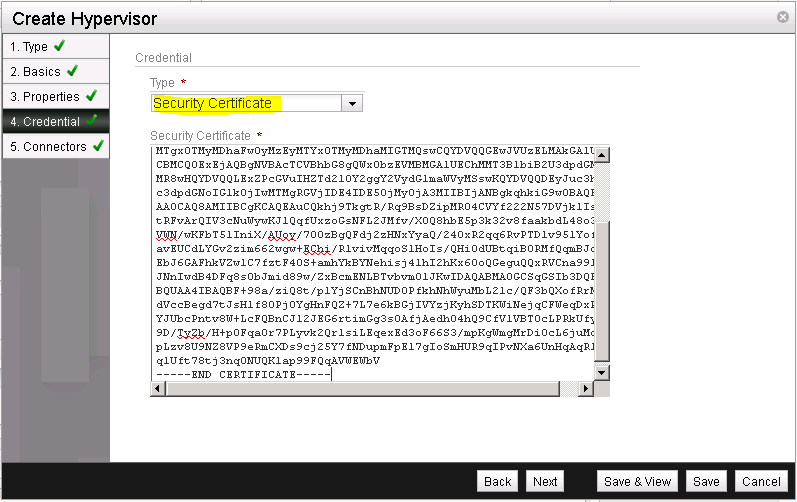
Next extract the SSL certificate from the NSX vSwitch with the command cat /etc/nsxvswitch/nsxvswitch-cert.pem.
Copy the text including the line ----BEGIN CERTIFICATE---- and ----END CERTIFICATE---- (See Figure 4). You will need this text in the next step.
Don’t close the SSH session yet. We will need to come back.
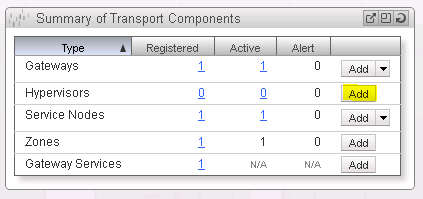
Return to the NSX Manager Dashboard. Within the Summary of Transport Components section, click on Add within the Hypervisor row (See Figure 5).
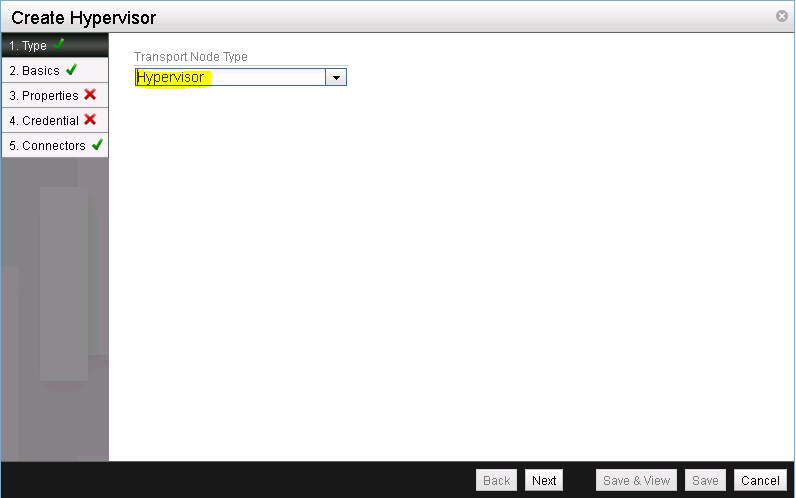
Confirm that the pre-selected transport type is Hypervisor (See Figure 6).
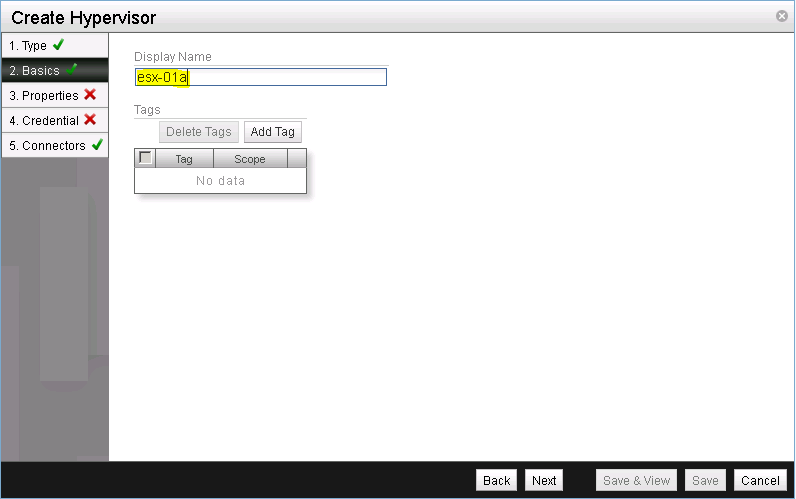
Give the gateway node a name (See Figure 7). I usually pick the hostname.
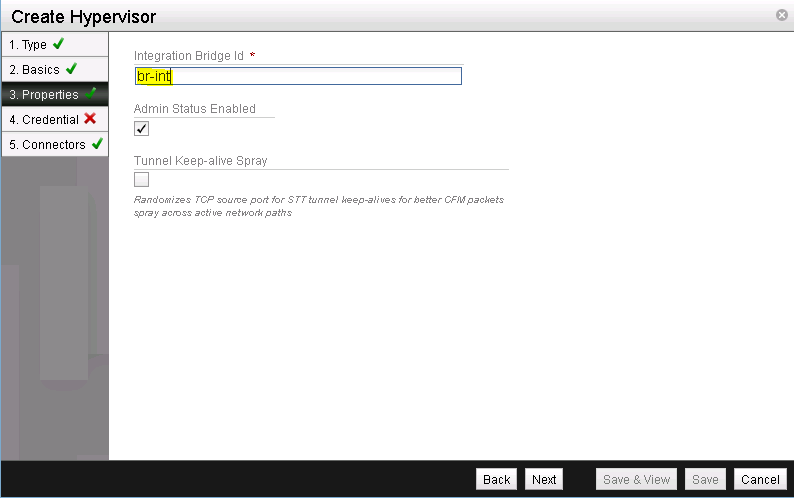
As the Integration Bridge Id specify br-int (See Figure 8). Leave the other values with the default setting. The Tunnel Keep-alive Spray would randomize TCP source ports for STT tunnel keep-alives for packet spray across active network path.
Select the Credential Type of Security Certificate and paste the previously copied certificate into the Security Certificate field (See Figure 9).
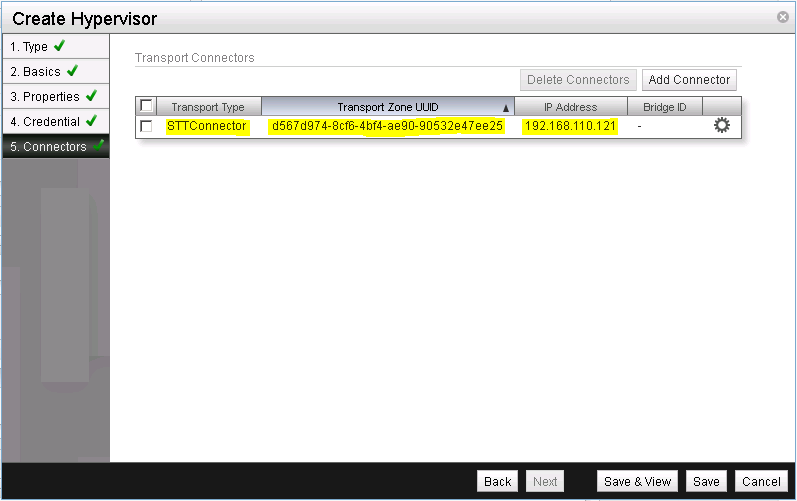
Create a transport connector for the NSX vSwitch using STT as the transport type and the IP address that you configured a few steps earlier (See Figure 10).
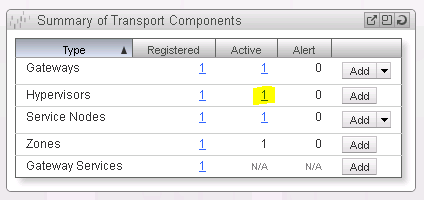
Return to the NSX Manager Dashboard, where you will see the new Hypervisor within the Summary of Transport Components section, within the Hypervisors row. Click on the number for active hypervisors to see more details (See Figure 11).
You should see the ESXi host with the NSX vSwitch successfully added as a hypervisor with the Connection status as “Up” (See Figure 12).

As a last step we need to instruct VMware NSX to export the OpenStack virtual machine virtual interface (vif) UUID as extra information besides the VMware vSphere one. This is necessary as OpenStack uses a different UUID than VMware vSphere does. Without this setting OpenStack wouldn’t “recognize” a VM that it created for further operations via the Neutron API.
Instruct NSX to allow custom vifs with the command nsxd --allow-custom-vifs. When asked for a username and password, enter the username and password for the ESXi host.
~ # nsxd --allow-custom-vifs
2013-12-18T19:50:15Z|00001|ovs_esxd|INFO|Normal operation
username : root
Password:
WARNING: can't open config file: /etc/pki/tls/openssl.cnf
nsxd: NSXD will be restarted now.
Killing nsxd (227588).
2013-12-18T19:50:21Z|00001|ovs_esxd|INFO|Normal operation
WARNING: can't open config file: /etc/pki/tls/openssl.cnf
Starting nsxd.
~ #
You can safely ignore the warning message about the config file /etc/pki/tls/openssl.cnf.
Instead verify that the configuration change has been applied with the command nsxcli custom-vifs/show
~ # nsxcli custom-vifs/show
Custom-VIFs: Enabled
~ #
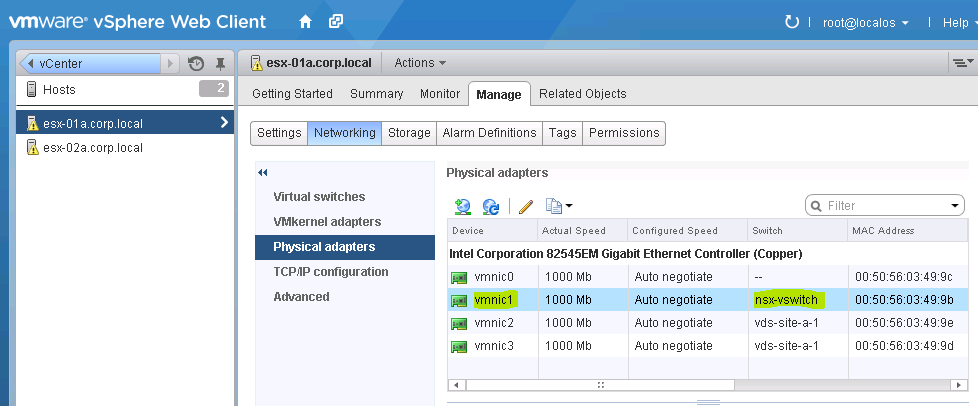
Return to the vSphere Web Client where you can see vmnic1 connected to the NSX vSwitch (See Figure 13).
Repeat the above steps for any additional ESX host that you want to use with this setup.
Verify the setup
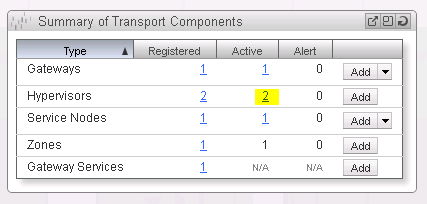
After you have installed and configured the NSX vSwitch on all Hypervisors, you can see the results in the NSX Manager Dashboard (See Figure 14).
This completes the installation of the NSX cluster, including ESXi as Hypervisors. Next in the series on OpenStack with vSphere and NSX is Part 4: “OpenStack with vSphere and NSX – Part 4: Import and configure the VMware vSphere OpenStack Virtual Appliance (VOVA)” with the import and configuration of the VMware vSphere OpenStack Virtual Appliance (VOVA). While it would be possible to use vSphere and NSX without OpenStack, it would require either another Cloud Management System (CMS) or manual creation of virtual network and NIC bindings via the ESXi CLI. As this goes beyond the simple setup that I want to showcase here, I will not include it.
Instead the next article highlights the easy to use VMware vSphere OpenStack Virtual Appliance (VOVA), an easy-to-use appliance that was built to simplify OpenStack deployment into a VMware vSphere environment for test, proof-of-concept and education purposes. VOVA runs all of the required OpenStack services (Nova, Glance, Cinder, Neutron, Keystone, and Horizon) in a single Ubuntu Linux appliance. Therefore you need to be a bit more patient before we can reap the fruits of our labor.

Leave a comment